Earlier posts of this series from below links:
- Installing and Configuring vRA 7.6
- Tenant and users Initial Configuration
- vRealize Automation 7.6 Part 3: Configuring Endpoints
- System / Infrastructure & Fabric Administrator
Blueprints are arguably the thing you’ll spend most of your operational time dealing with in vRealize Automation. We’ve finally gotten most of the setup done so that we can publish our vSphere templates in vRA.
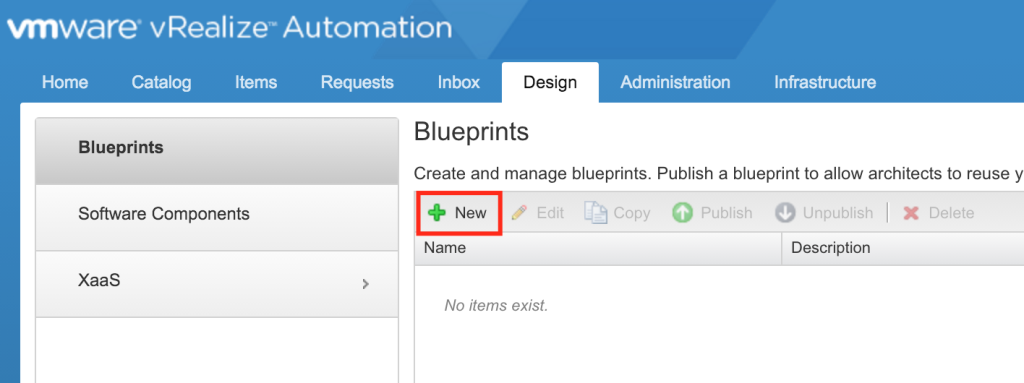
To create a blueprint in vRealize Automation 7 go to the “Design” tab. Note: If you’re missing this tab, be sure you added yourself to the custom group with permissions like we did in a previous post, and that you’ve logged back into the portal after doing so.
Click the “New” button to add a new blueprint
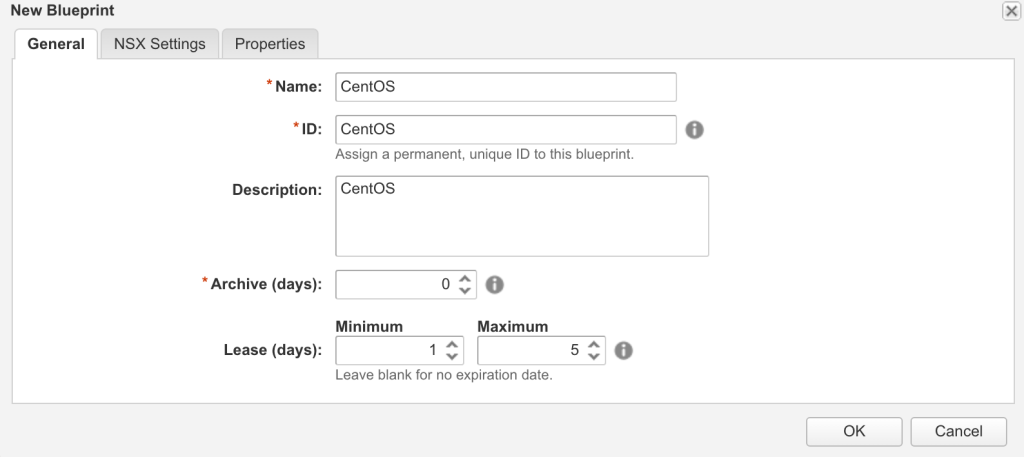
Give the new blueprint a name and a Unique ID. The ID can’t be changed later so be sure to make it a good one. Next, enter a description as well as the lifecycle information. Archive (days) determines how long an item will be kept after a lease expires. The lease is how long an item can be provisioned before it’s automatically removed. Click OK
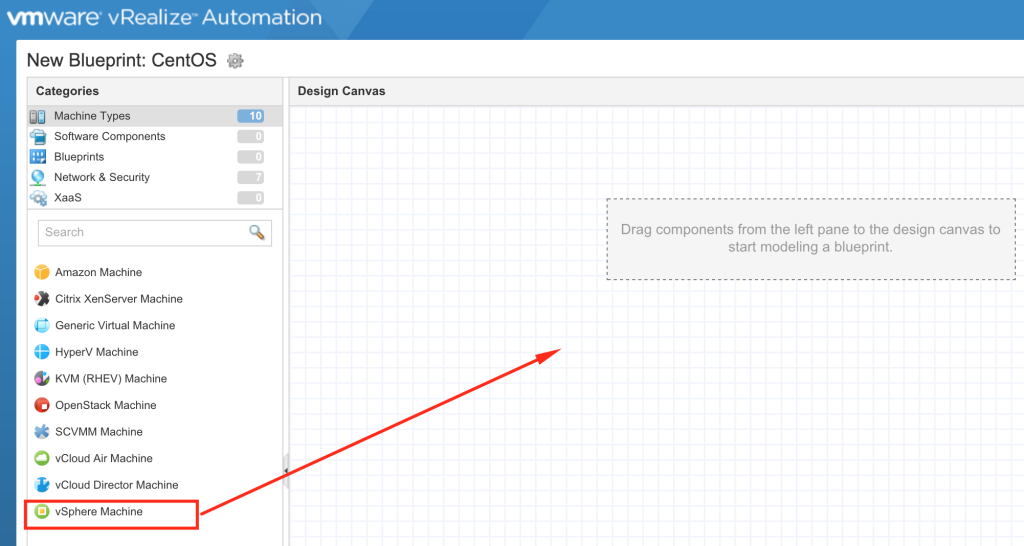
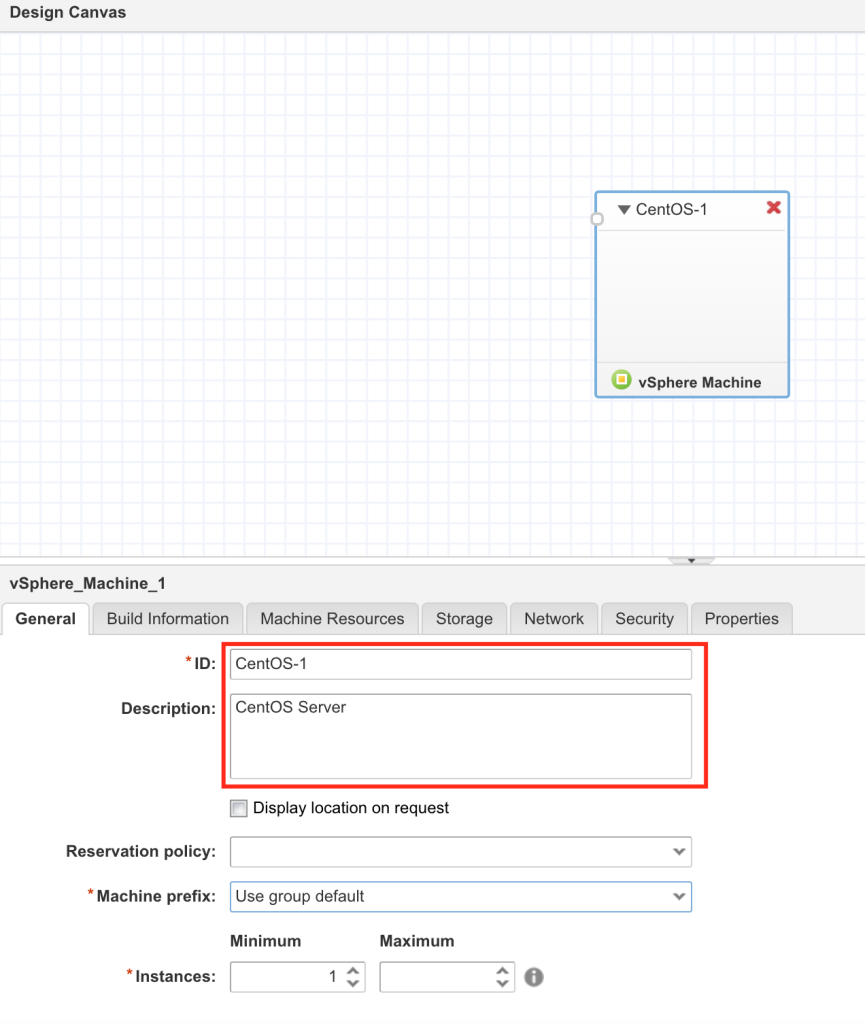
Now we’ve given our blueprint some basic characteristics. The next step is to put all of our “stuff” into the blueprint. For my very basic example, I’m going to drag the “vSphere Machine” object onto our design canvas. This adds a vCenter template into our blueprint. As you can see we have a lot of options to be added to our blueprint, such as multiple machine types, networks, software and other services. A really neat change to version 7 over version 6 if you ask me.
Once we’ve added our components into the blueprint, we need to give each of them some characteristics. To start, we’re going to give the component an ID and description.
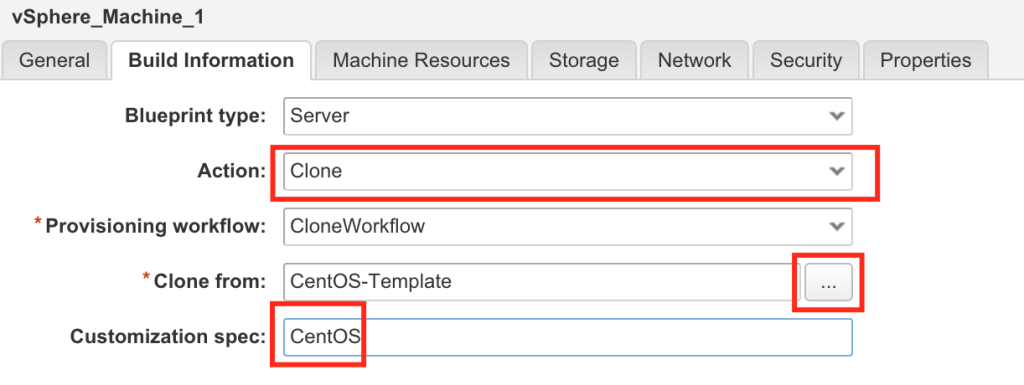
On the Build Information tab, I’m going to make sure the blueprint type is “Server” and I’m going to change the Action to “Clone”. Click the ellipsis and select one of your vSphere templates. And lastly on this tab enter a customization spec exactly how it is named in vSphere, including case sensitivity.
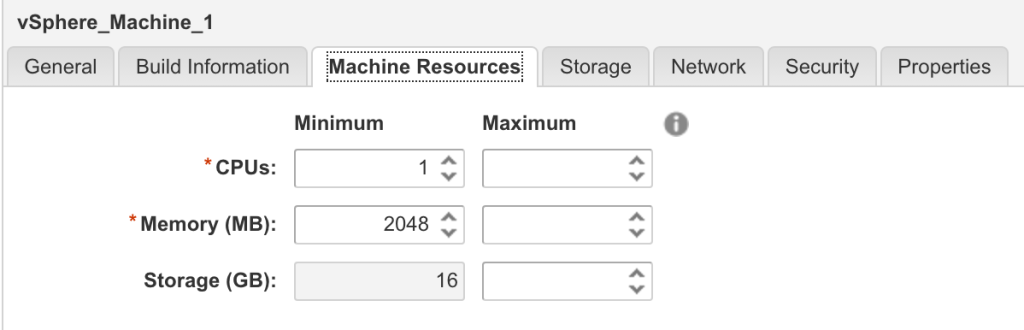
The next tab is the “Machine Resources” tab. Here we need to enter in the size of this virtual machine, or the max sizes that a user could request. Fill out your values and go to the next tab.
The storage tab will let us customize the sizes of our disks. I’ve left my disk sizes the same as my vSphere template, but you can change them if needed.

The network tab, I’ve also left blank. I’m letting the network in my vSphere template dictate what networks I’ll be deployed on. For a larger corporate installation, you’ll want to specify some network info here

The security tab is to be used specifically with NSX or vCNS. So fare we’re not using this so we’ll leave it blank for now.

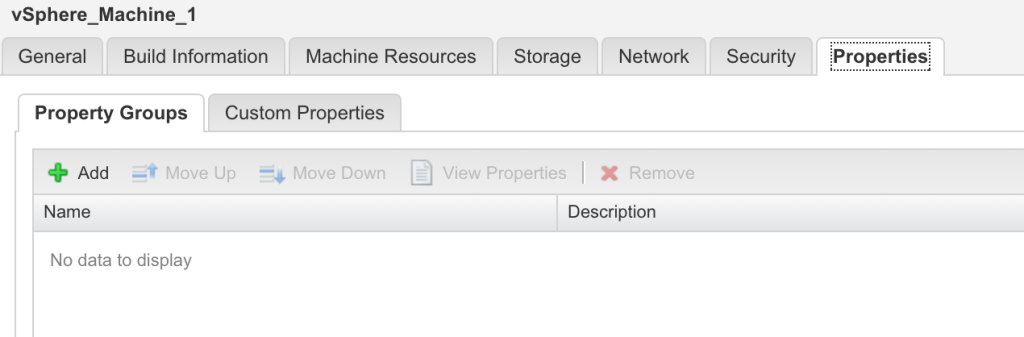
Custom properties deserve their own blog post or series of blog posts. They will allow us to do lots of cool things during provisioning, but they are not required to deploy a machine from blueprint. If you understand them, you can enter them here for the blueprint.
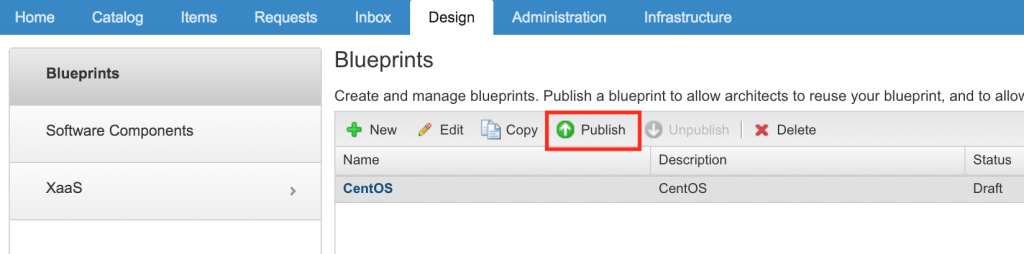
When you’re all done fiddling with your settings click “Finish”. When you’re done, you’ll see your blueprint listed in the grid. Before it can be assigned to people though, it must be published. Click the blueprint in the grid and then select the “Publish” button.