If you have visited directly on this page then I would highly recommend you to read earlier posts of this series from below links:
1. Installation SQL Server and IaaS DB
In this post we will learn about default tenant initial configuration and how to associate directory services with vRA.
Login to vRA appliance https://VRA-FQDN/vcac and use administrator as username and password set during deployment.
If this is your production deployment, then you might want to use your company branding i.e setting up logo etc.
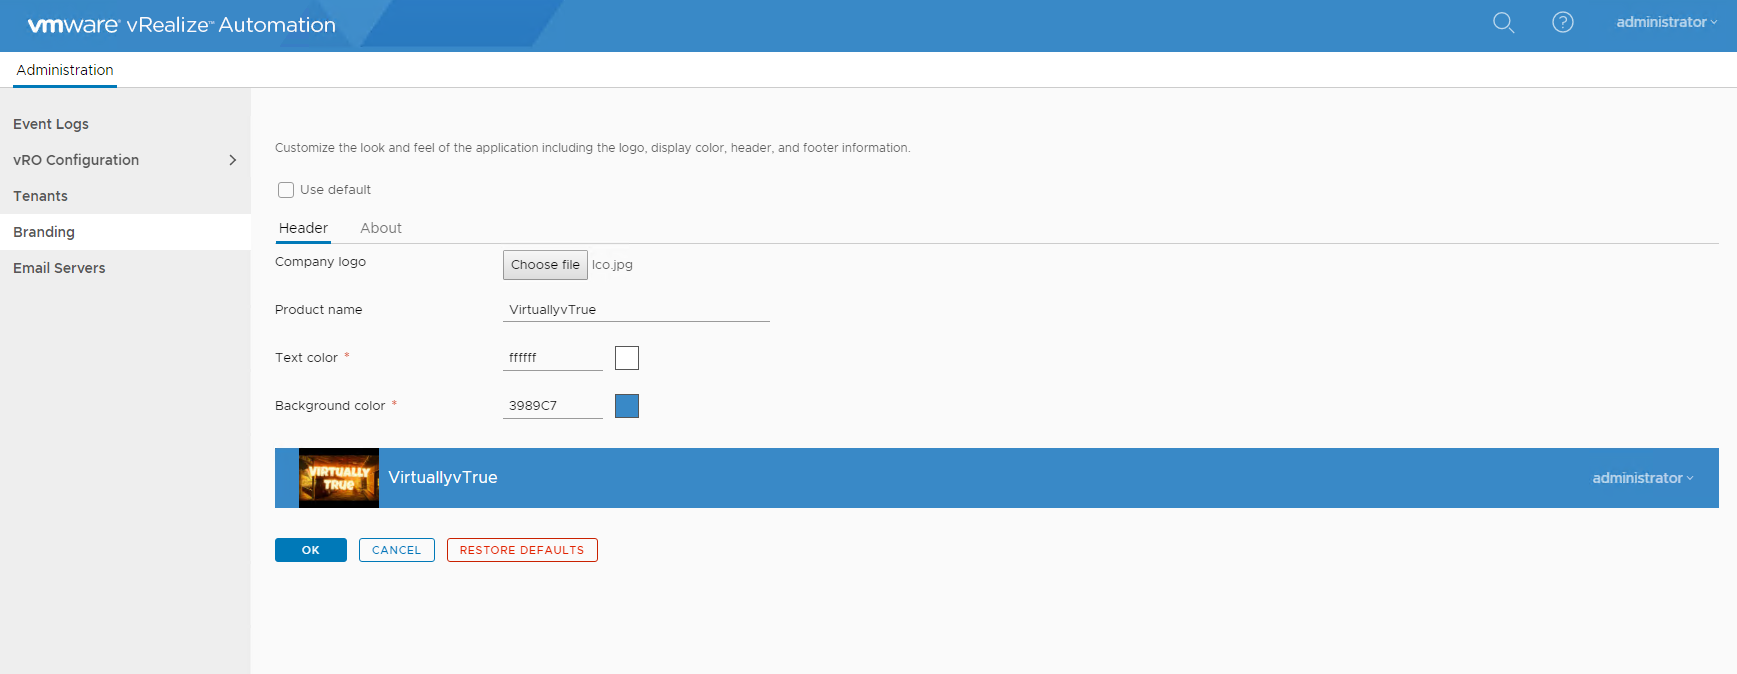
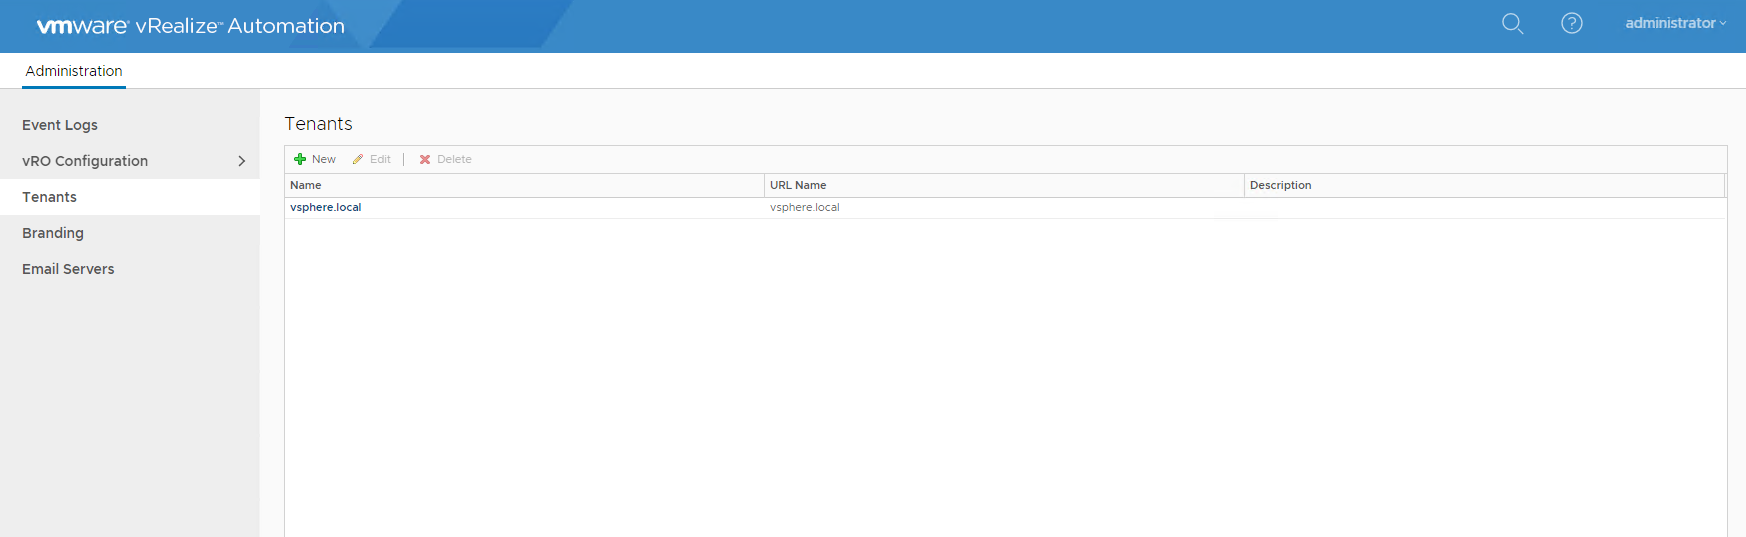
Once you are done with branding your vRA instance, navigate to Administration -> Tenants. Select the default tenant and click on edit button.
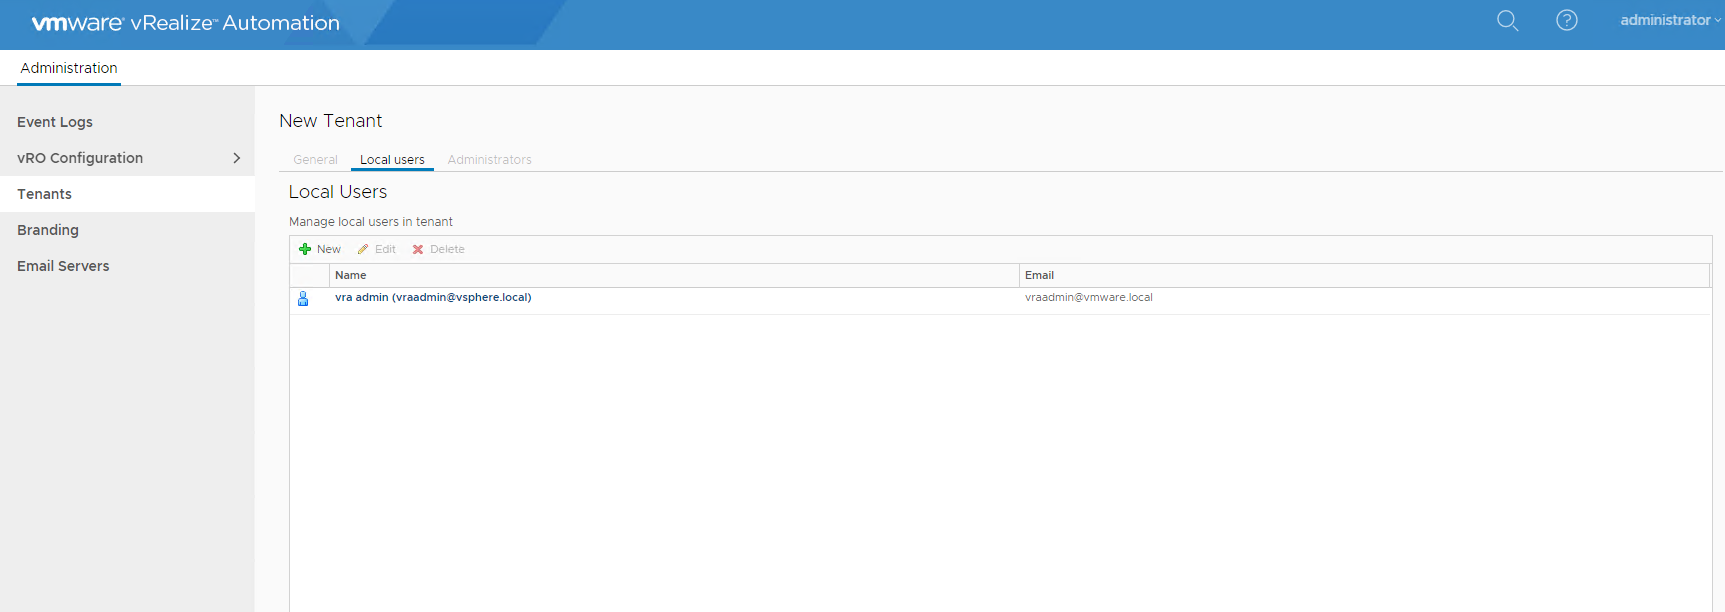
Click on + button to add a new local user.
Since we don’t have any directory integration with vRA yet, we must add a local user and assign that user tenant admin and IaaS admin role.
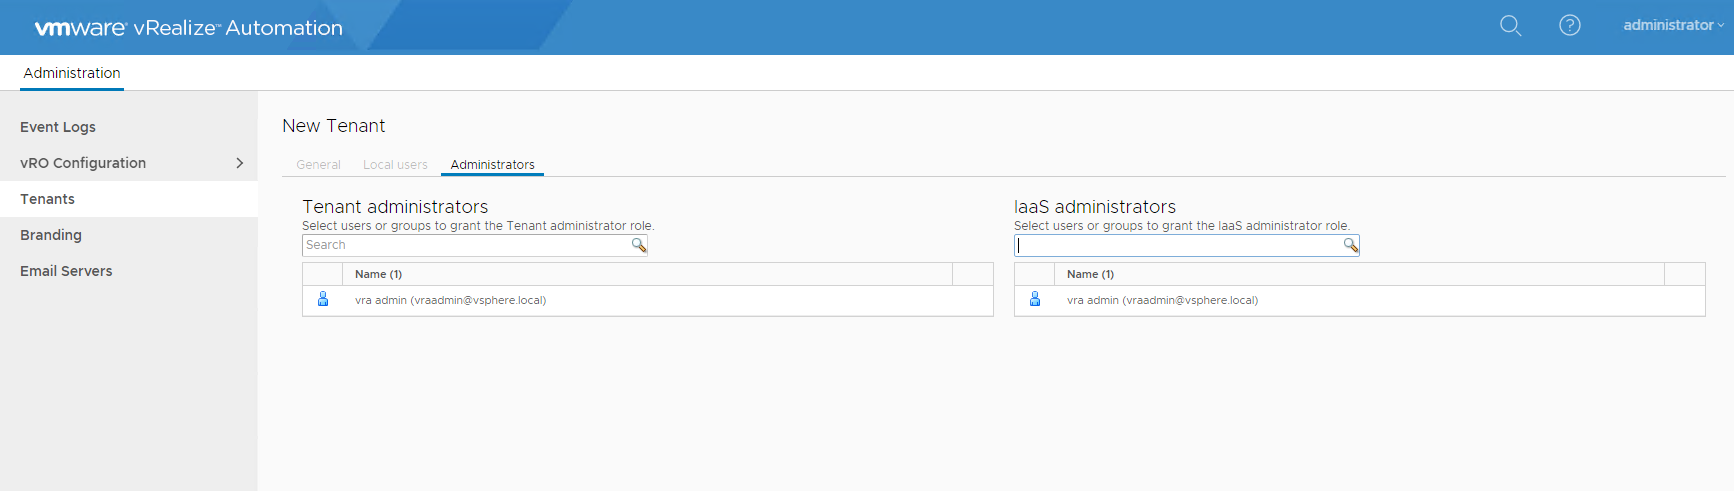
Navigate to administrator’s tab and add the local user under Tenant administrator and IaaS administrator.
Logout from vRA and log back in via the tenant admin (the local user we just defined)
URL: https://vra-fqdn/vcac/org/<userurl>/
Click on Directory management.

Select directories from the list and click on + button to add a directory service.
In my case I’m using AD (Integrated Windows Authentication)
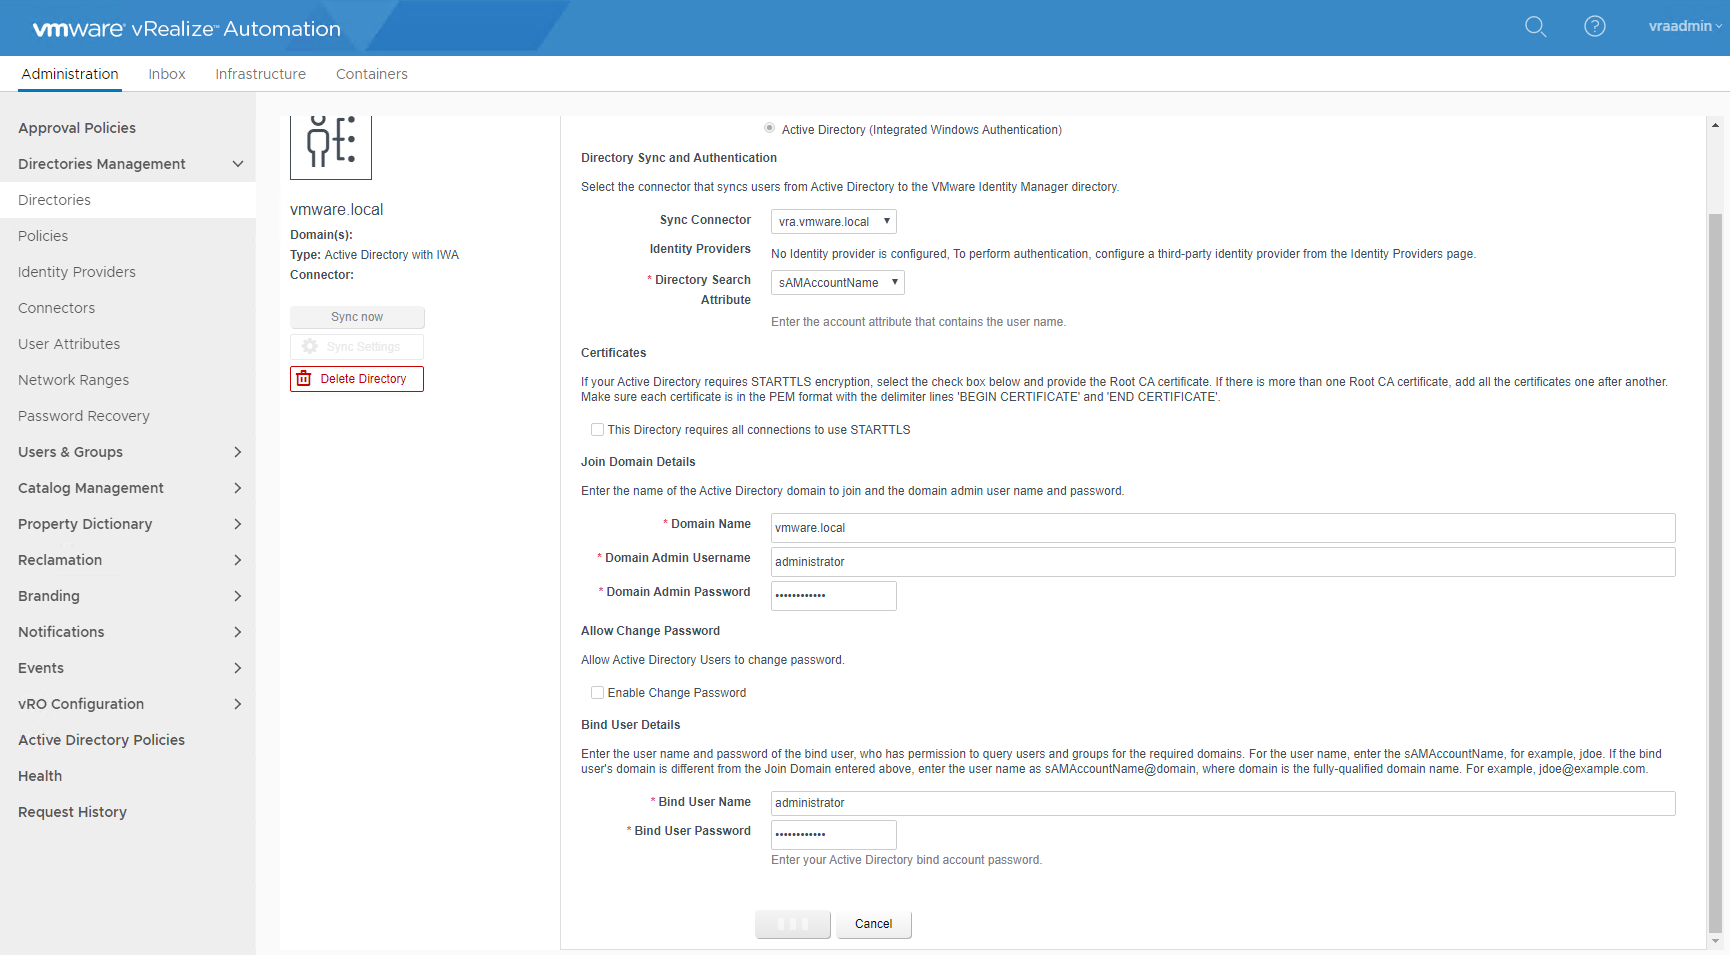
Click on newly added directory service and select sync now.

Later you can select which user/groups you want to sync from AD to vIDM database. If you have a large organizations and have thousands of users and groups, then it’s not a good idea to sync them all as not all of them will be consuming your vRA based cloud.
Note: By default vRA sync user/groups from AD on weekly basis, so any new user/group created in AD will be synced to vIDM database when next periodic sync occurs. But you can also manually invoke the sync process or can change the sync settings to determine how often vRA should sync with AD. You can change the Sync frequency according to your convenience.
Hope this post is useful, please leave your comments below.

Comments are closed.