Make sure that you have gone through vRA 7.6 documentation https://docs.vmware.com/en/vRealize-Automation/7.6/com.vmware.vra.install.upgrade.doc/GUID-642128A6-B52E-428F-B3D6-831F7809C14F.html
Once the ovf is deployed and appliance is powered on, you can login to appliance VAMI by accessing https://VRA-FQDN:5480
Also make sure that you have met all the per-requisite before you start the ova deployment. As soon as you login to VAMI, vRealize Automation installation wizard will automatically launched.
Important: Please don’t cancel the wizard because if you do so, you must go through hassle of doing all the configuration manually. If you cancelled the wizard by mistake and don’t want to do the manual configuration, then you can force vRA to launch the installation wizard by firing below command via ssh session.
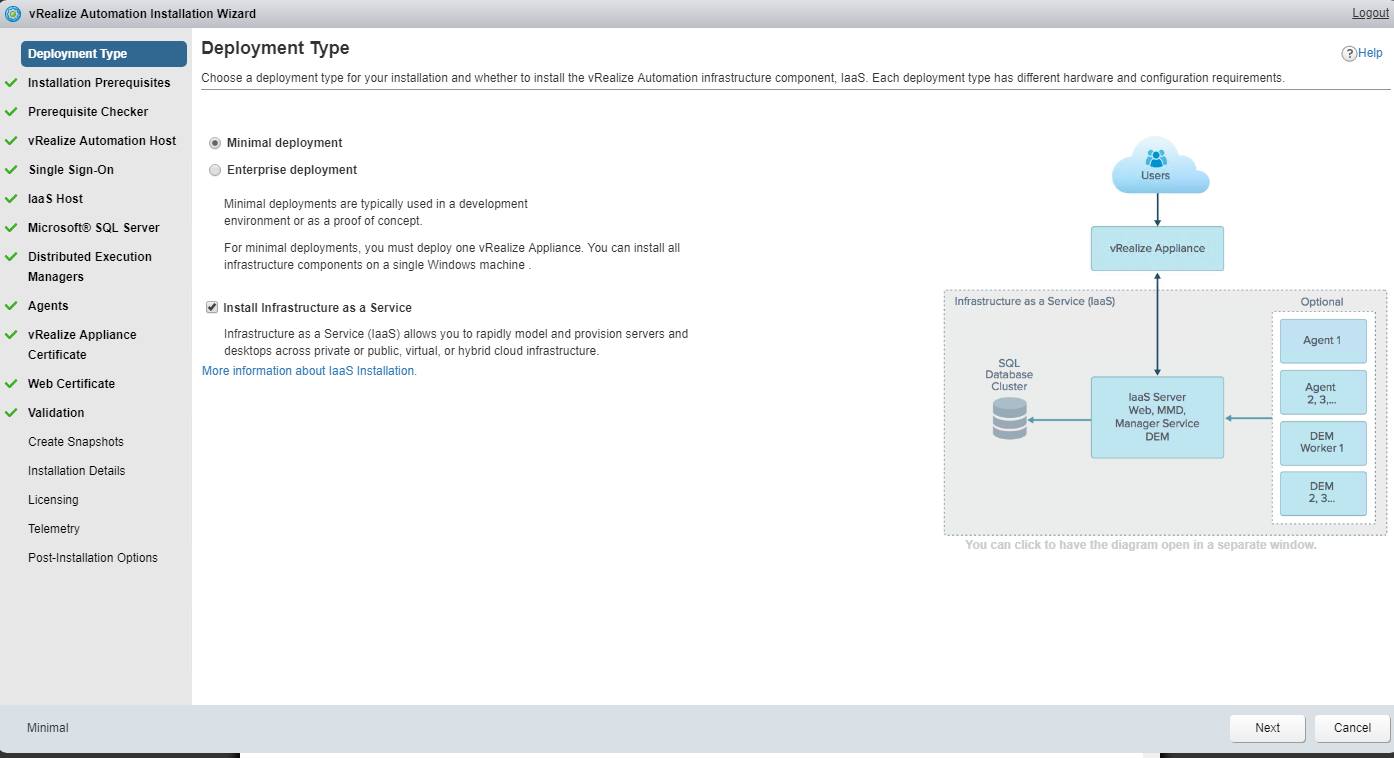
Once the wizard is launched, hit next to continue.
If you are planning to include IaaS along with vRA then make sure Install Infrastructure as a Service box is selected.
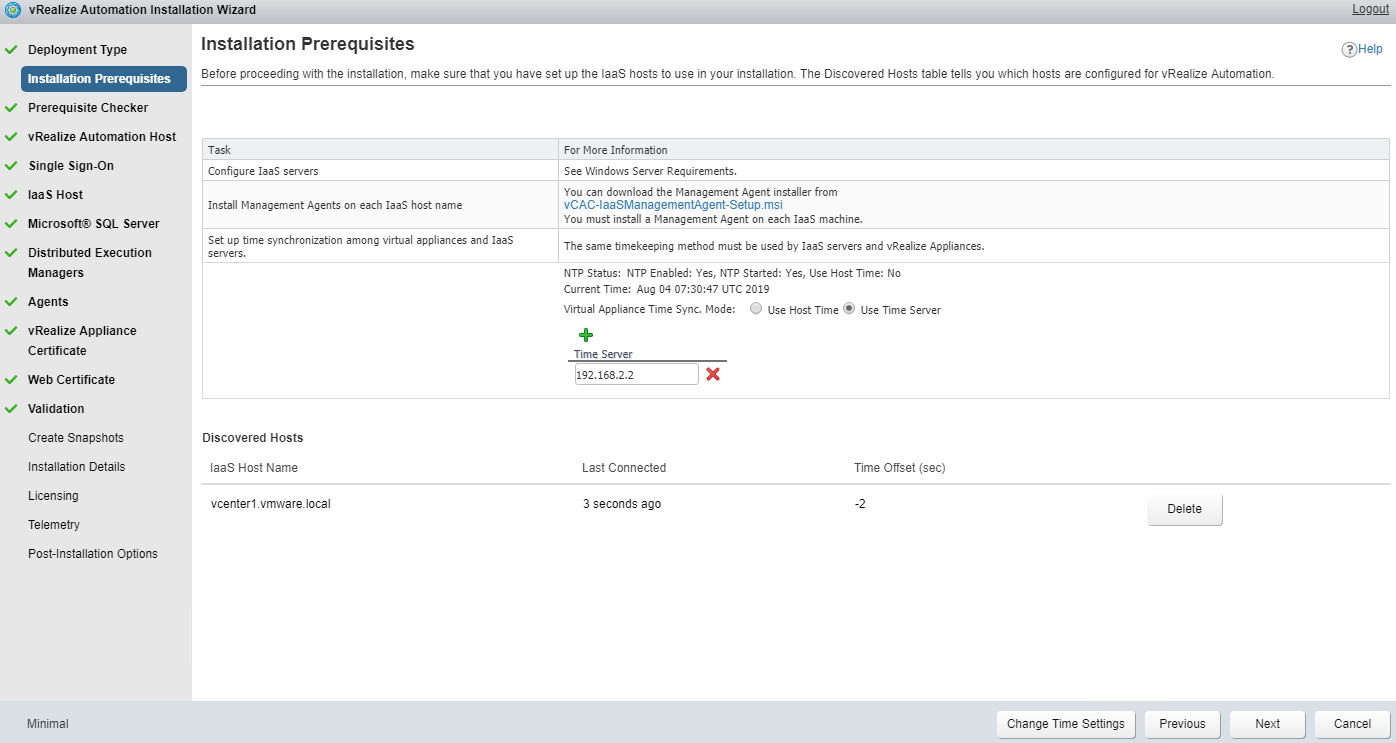
When you reach to installation prerequisites page, don’t hit next. We need to grab the IaaS management agent from this page and install it on our IaaS host so that installation wizard can auto discover the registered host.
Click on the vCAC-IaaSManagemntAgent-Setup.msi to download.
RDP into your IaaS node and paste the hyperlink in the browser. Click on download management Agent installer.
Now, return to the vRA installation wizard and you will see that your IaaS host is auto discovered via the management agent which you just installed on IaaS host.
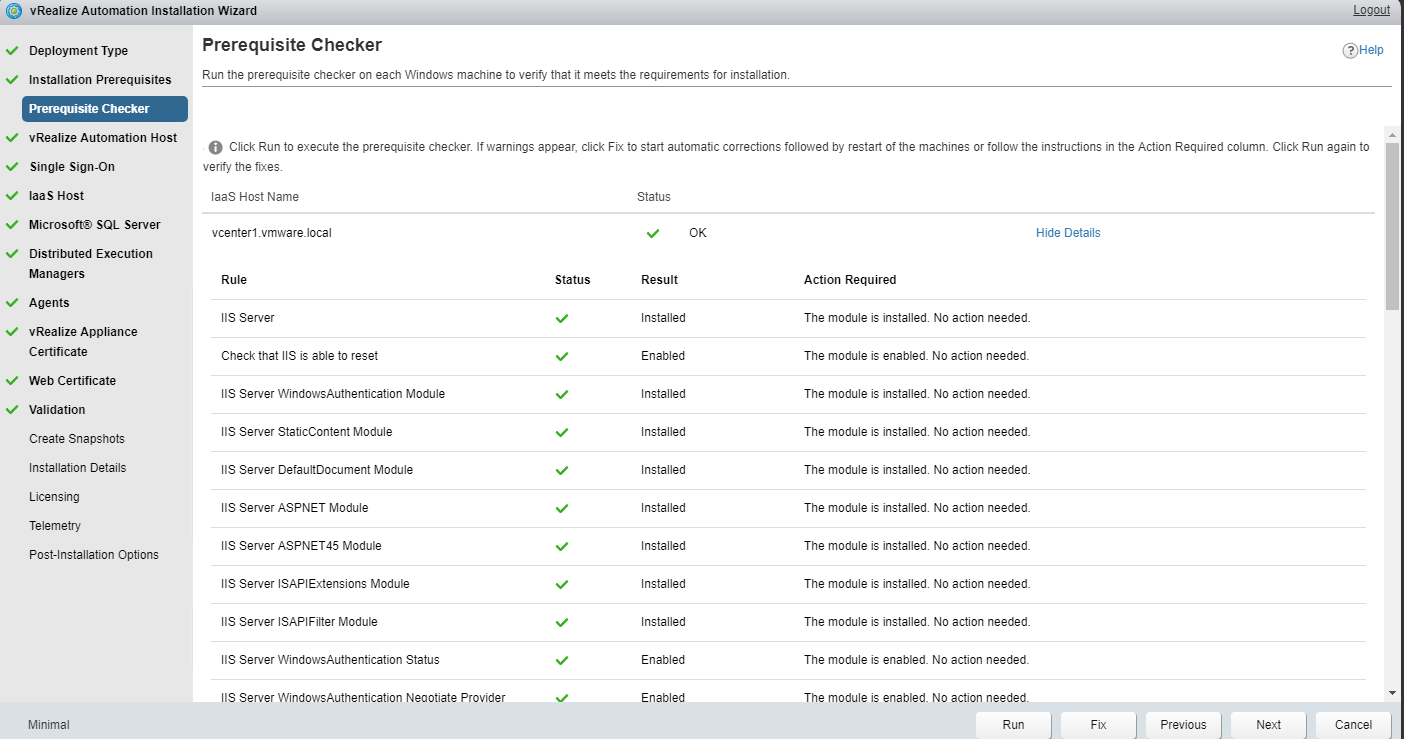
Click on run button so that the installation wizard can find for all the prerequisites are in place or not.
The Prerequisite Check invokes the vRA Management Agent to analyze each IaaS node to determine prerequisite status.
Once the checks are complete, you are going to see few items missing. Since we have not configured anything on IaaS host yet, you are going to see message “some prerequisites are not met”.
Clicking on show details tells you what configuration are missing.
You don’t have to manually fix the missing items . Just hit the fix button to push the missing configurations on IaaS host. Once the installation wizard has pushed all the updates to each IaaS node, the checks will be run once again automatically. At this point you will see the status as OK.
Hit next to continue.
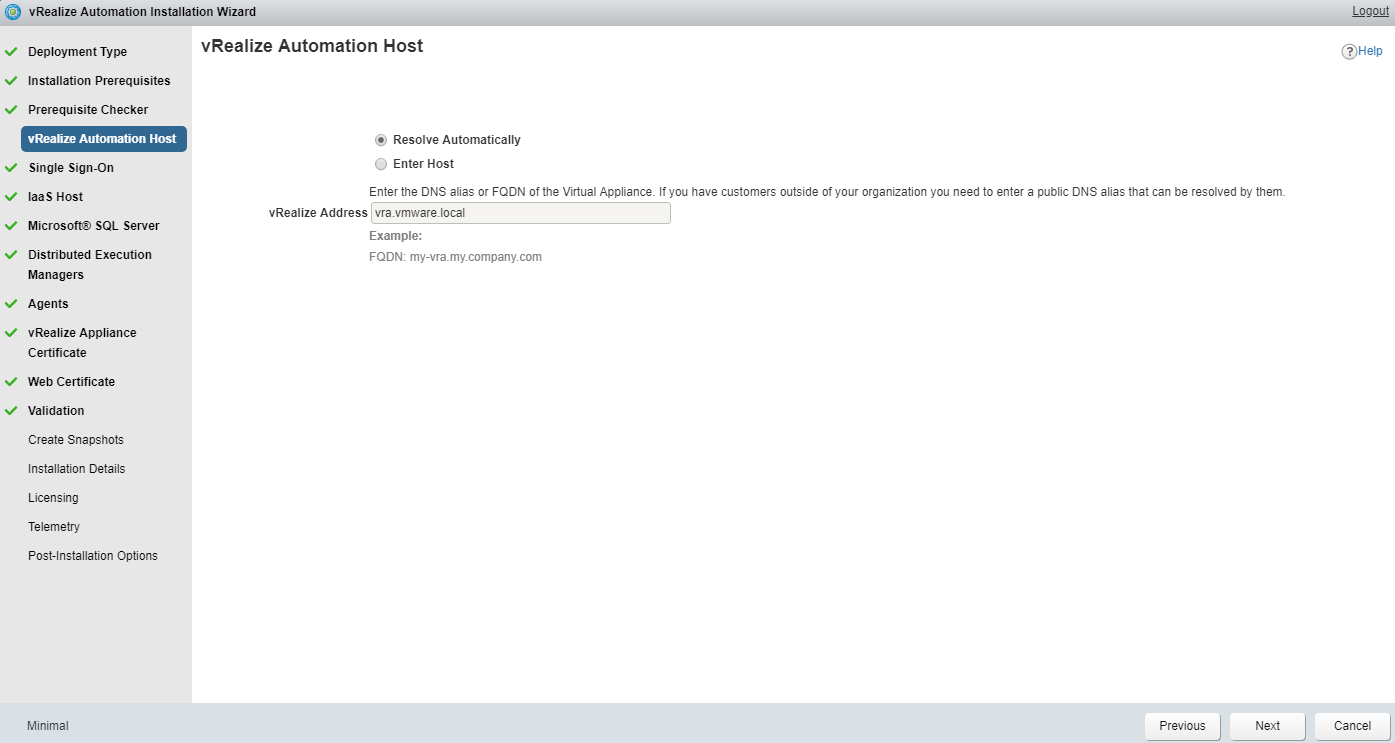
For vRA host, click on Resolve automatically or enter the FQDN manually.
Enter the password for SSO admin (administrator@vsphere.local)

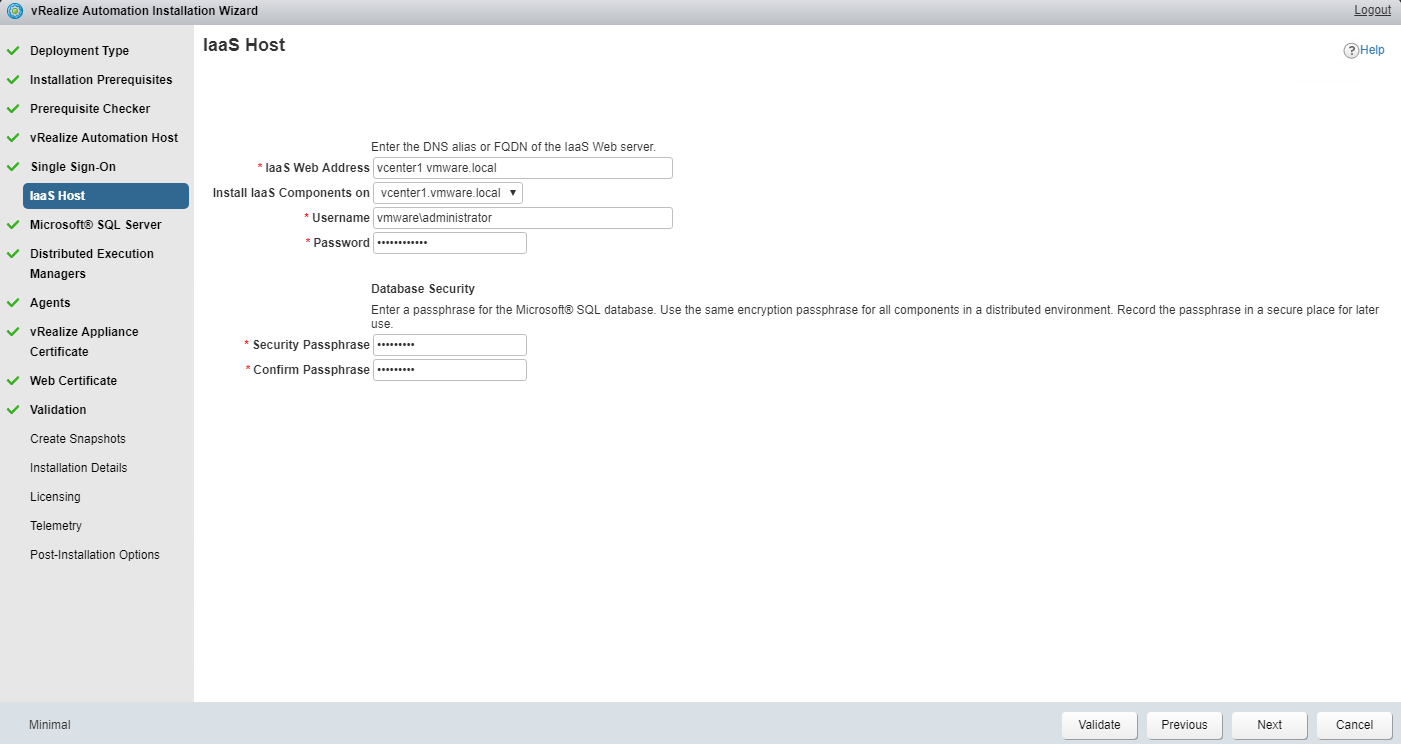
Enter the fqdn for IaaS Web Services and select the node on which IaaS components will be installed. I have only one IaaS node in my lab so I selected the same node for web service and iaas components.
Enter a passphrase that will be used to encrypt the SQL database.
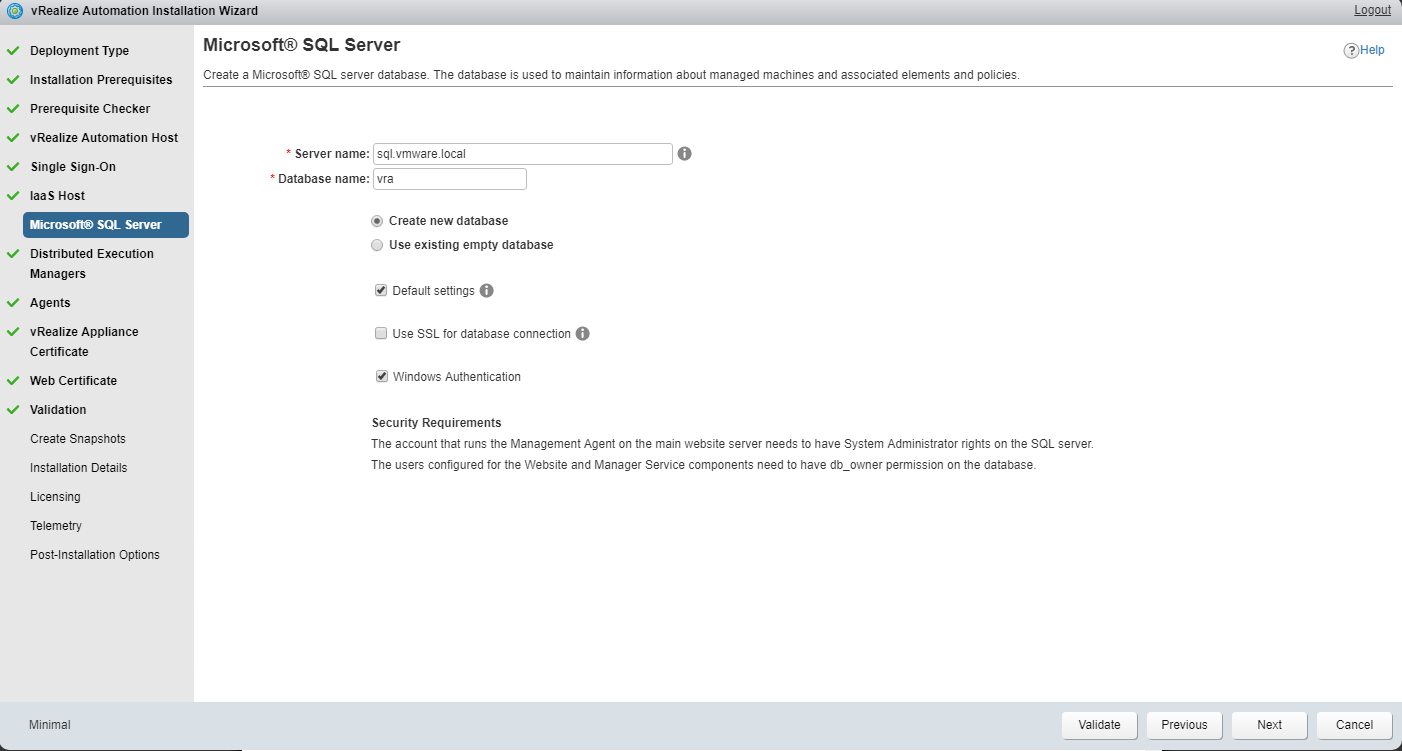
Enter the details of the node where SQL server is installed.
In my lab my MSSQL server is external to IaaS host.
Select “Create new databse” box and provide a name for the DB. Also enter the credentials via which installer will login to the sql server to do the database creation/configuration.
I have already created a database manually on SQL Server.
Enter the DEM Instance Name and enter the Username and Password for each of the DEM instances. As a best practice this should be the same dedicated vRA service account.

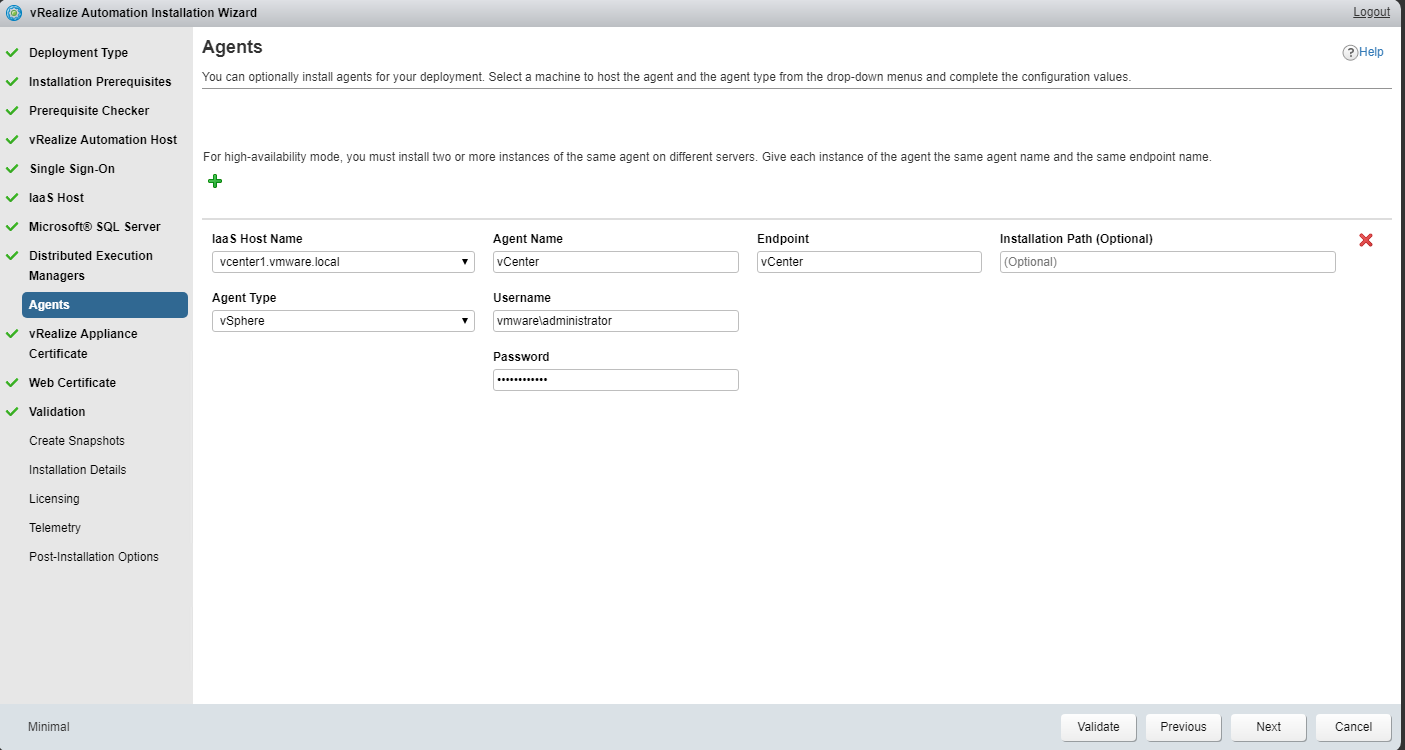
The installation wizard installs and configures the initial agents…typically for vSphere/vCenter endpoints. Additional agents (for other platforms) can be installed separately.
Enter the [vCenter] Agent details
- Agent Name:
- Endpoint: vCenter server fqdn
- Agent Type: vSphere
- Username
- Password
Validate the settings by clicking on validate button and if everything is fine, hit Next to continue.
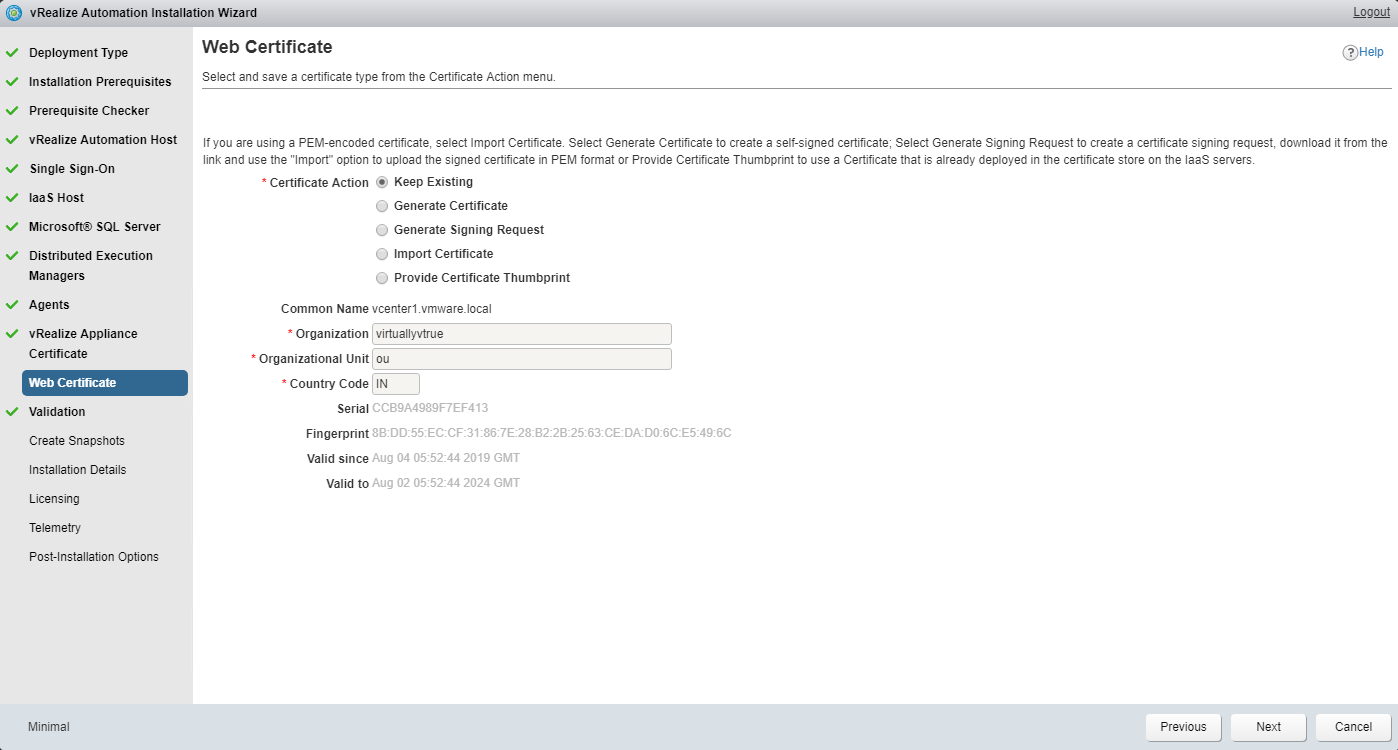
For vRA certs, you can keep the default certs or select Generate certificate and enter your Organization details etc and a new self-signed cert will be installed on vRA host.

I used the same step for Web Certificate.
Now we are almost through the vRA configuration part. Click on validate button to make sure everything configured so far is proper and we are good to go. The validation process takes some time.
Note: If validation is failed for any component, do not proceed further until that issue is addressed. Details will be provided for anything that fails. Fix the issue then come back to the wizard and try validation again.
Once the validation is completed and all checks are successful, hit next to continue.

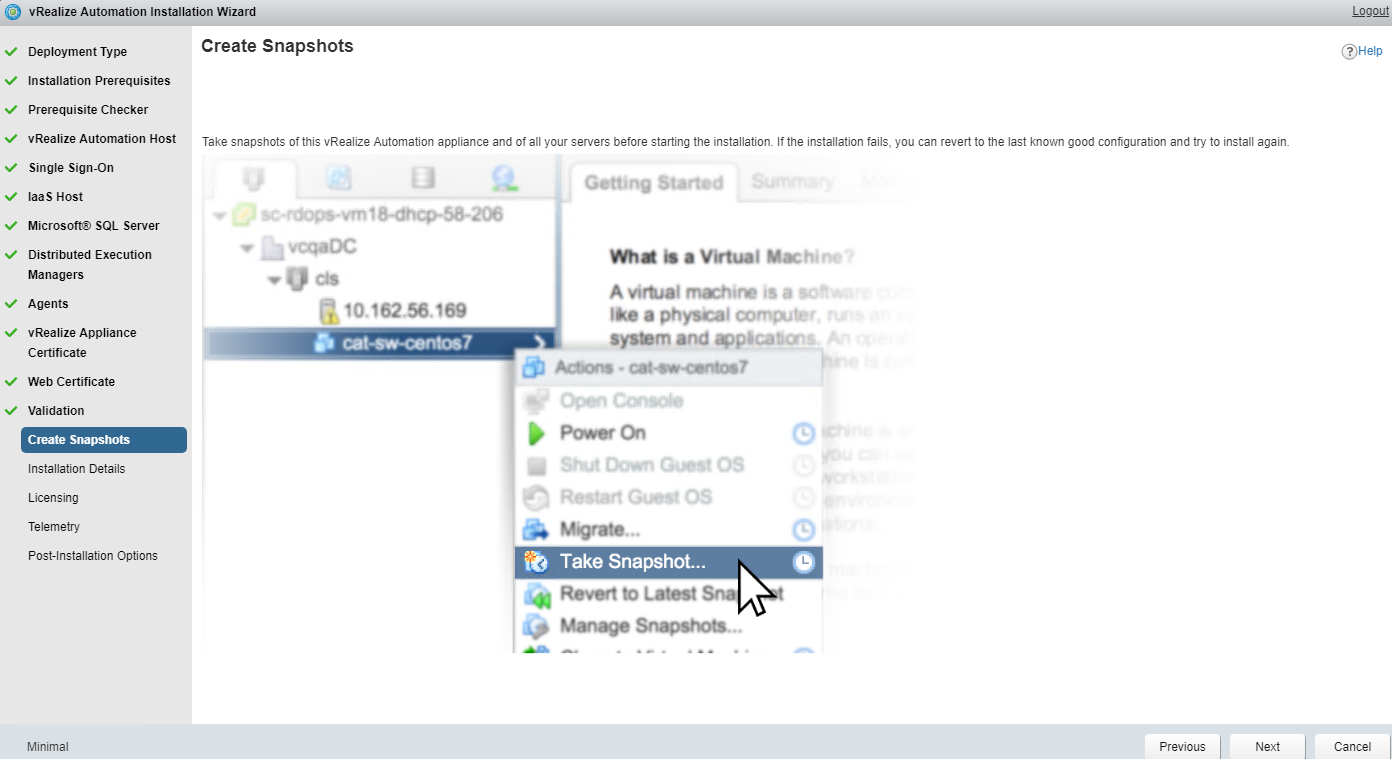
At this point installer will remind you to take snapshot of the nodes (vRA, IaaS host, IaaS DB etc) involved in this deployment.
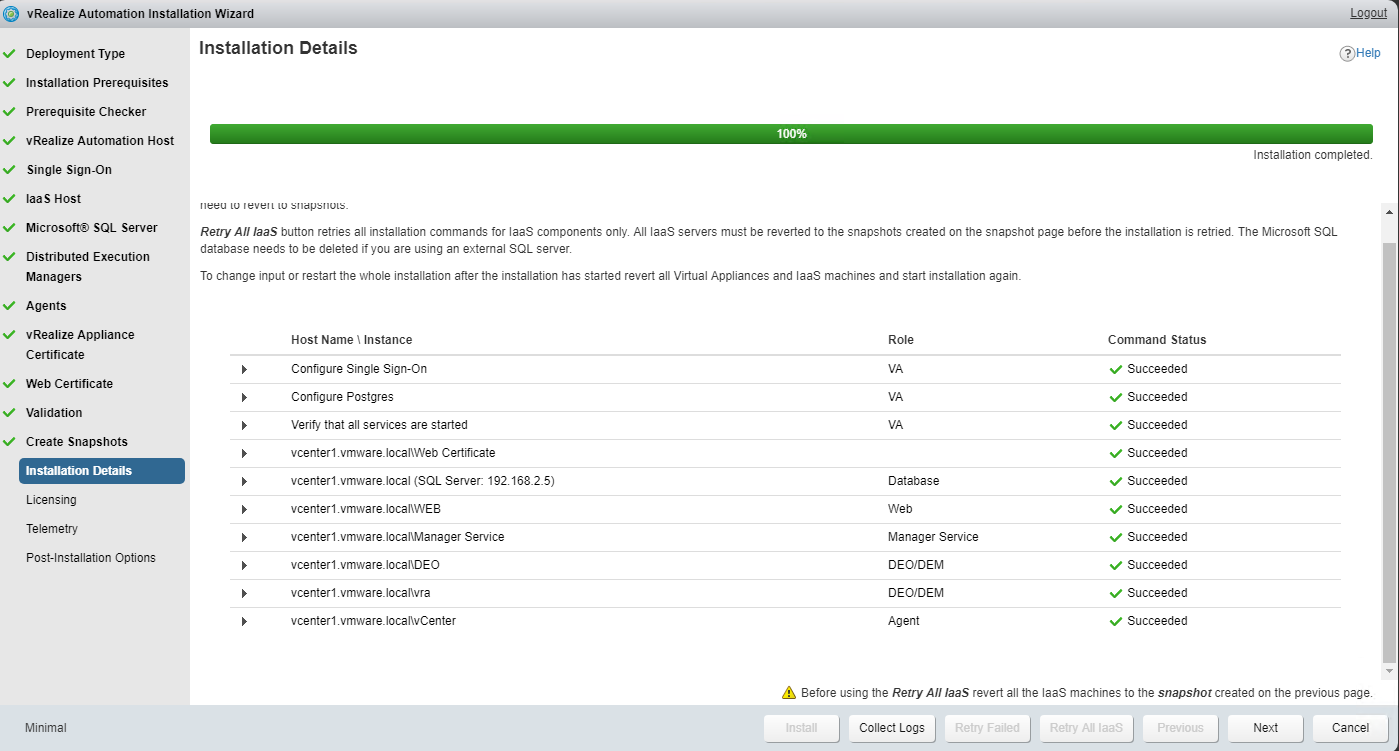
Click Next and wait until the install is completed.
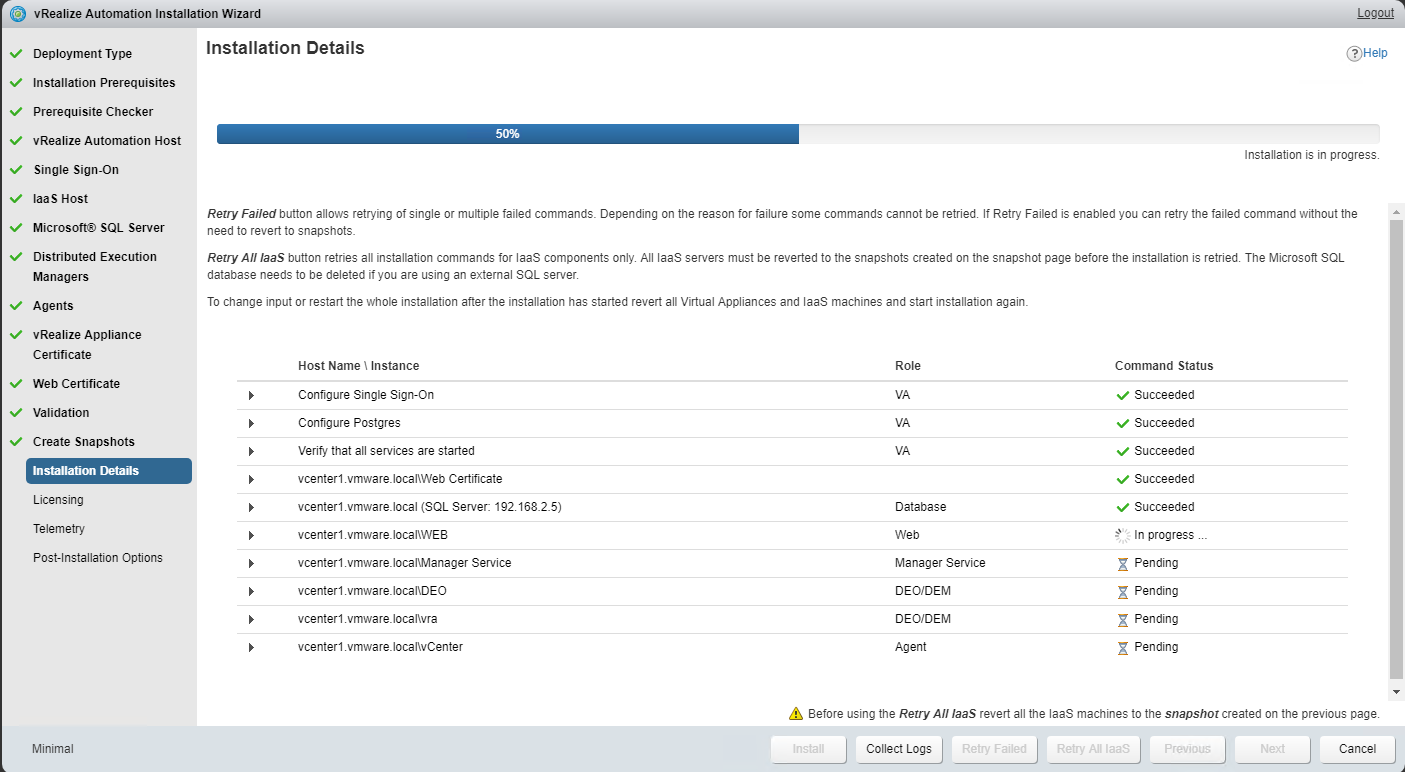
Hit next once the installation is completed.
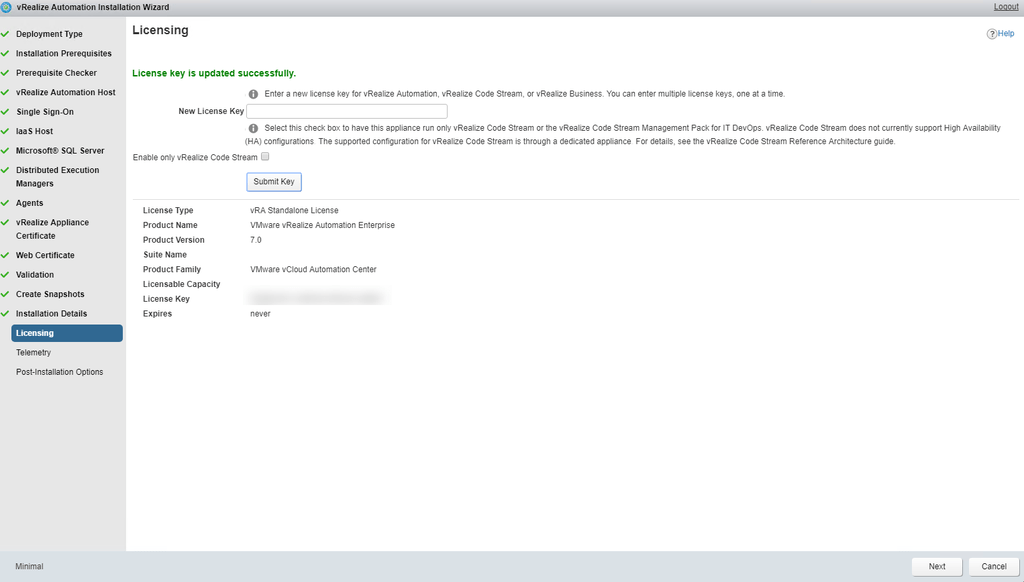
Click next and enter your vRA License Key and again click Next.
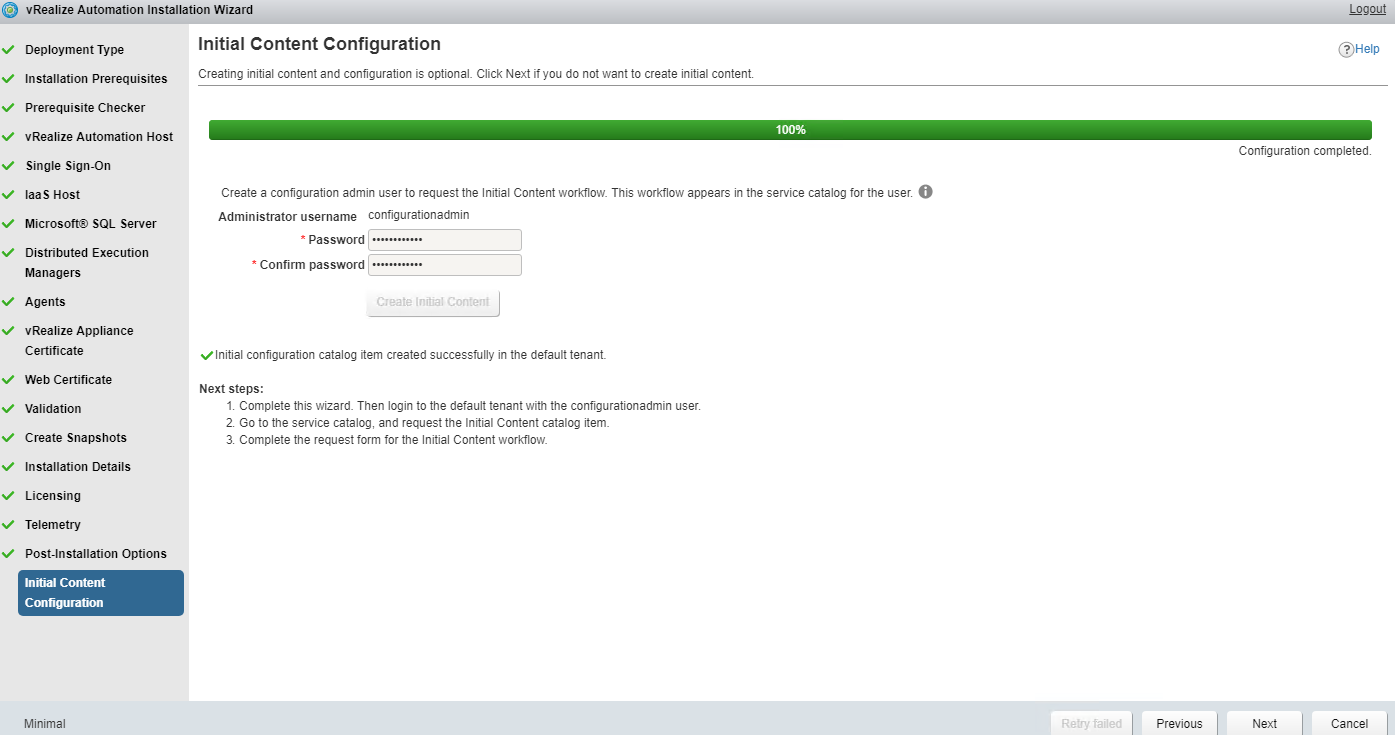
Post installation is completed you can go with request initial content. This option configures the initial Tenant content where a configuration admin is created and XaaS service is installed which will walk you through setting up initial tenant logic.
An initial catalog item will be created in default tenant.
Now as you have successfully completed the vRA 7.6 installation. Clicking on finish will close the installation wizard.
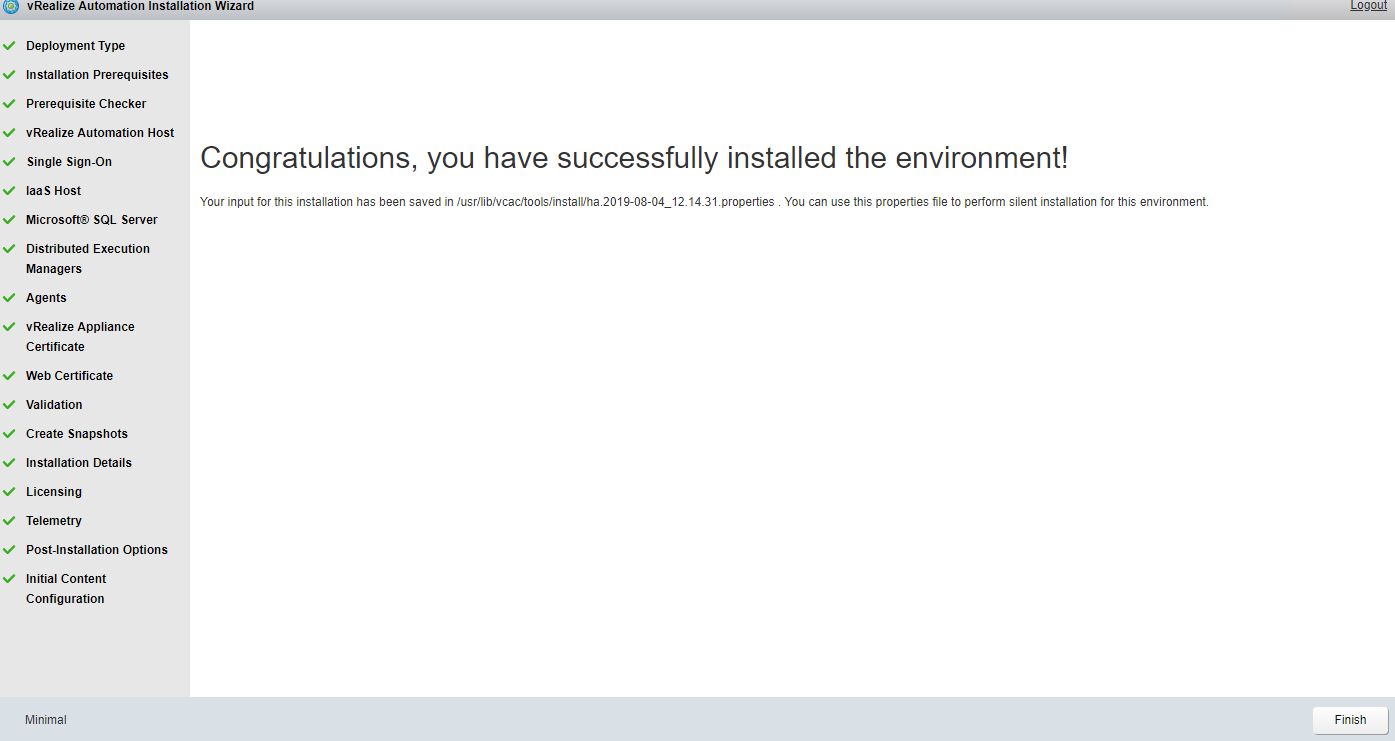
From services tab you can verify all the services has been registered.

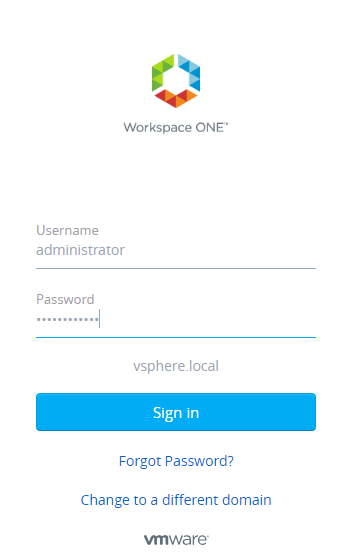
Login to vRA 7.6 appliance https://VRA-FQDN/vcac and you will be redirected to Workspace One page.
Login with administrator user and password set during deployment.
Your vRA installation is completed and is ready for deploying VM using default blueprints.

In coming post of vRA series we will see how to configure blueprint, catalogs, approval policies etc.

Comments are closed.