The KMS or ‘Key Management Server’ is as the name implies used to store encryption keys. They come in the form of both hardware and software appliances which run completely separately from vSphere. Once a virtual machine is encrypted, vSphere needs somewhere to save the decryption key and for that it uses the KMS.
Step 1 – Download OVA Package
From the HyTrust website download the OVA package (60-Day Trial) available here. A zip file with multiple files will be downloaded.
Note: make sure you know the IP address and any other required network connection information, such as the domain name and the DNS and gateway IP addresses for the machine which you are going to deploy as KMS server
Step 2 – Deploying the OVA Package
Log in to your vSphere Web Client. Navigate to Hosts and Clusters. Select the Datacenter where you would like to deploy the KMS server and select Actions and Deploy OVF/OVA Template.

Select a name for the KMS server and folder where to place the new VM. Now select a Compute Resource, in my case I select cluster C8 itself.
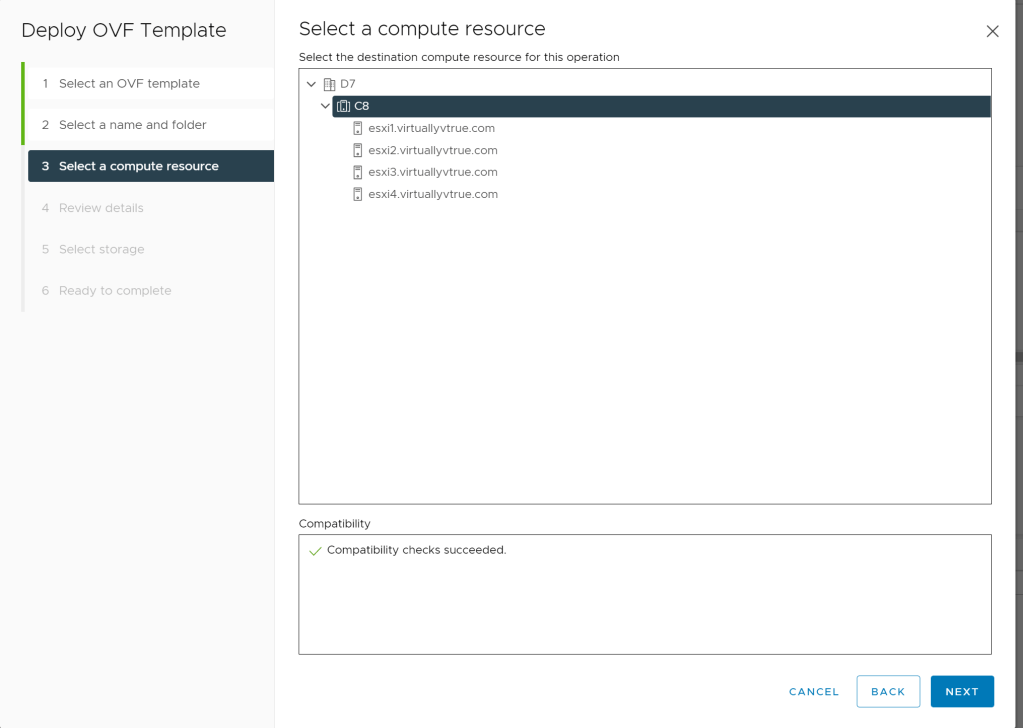
As soon as you press Next on step 3 of the deploy wizard it will load the OVF and switches from an original 6 steps deployment to a 10 step deployment after reading the OVF content. Review the details about the appliance (OVA) you are about to deploy.
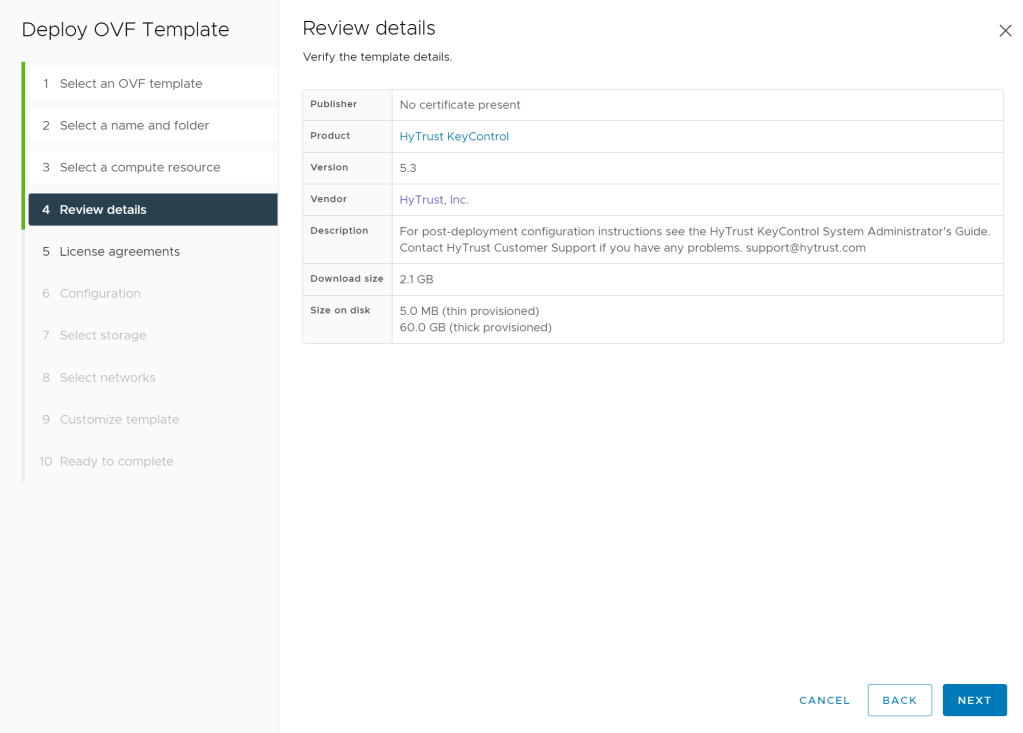
Read and Accept the license agreement and continue to Configuring the appliance. I chose Demo so it deployed the VM with 2 vCPUs and 4 GB memory in use. Other two options are Large (4 vCPUs and 16GB) and Recommended (2 vCPUs and 8 GB).
Now choose the right Storage to store the machine and correct Network to connect with. On the Customize template step you will insert all network and name values needed for the appliance to start working.

Review all settings on the Ready to complete step and press the Finish button. It will start two tasks in vCenter named Deploy and Import OVF. Wait till they finish successfully, before moving to the next step.

Step 3 – Configuring the newly deployed KMS appliance
Power on the newly deployed KMS server. It will ask you to specify a password for the htadmin account. Enter a new password for htadmin and press OK.
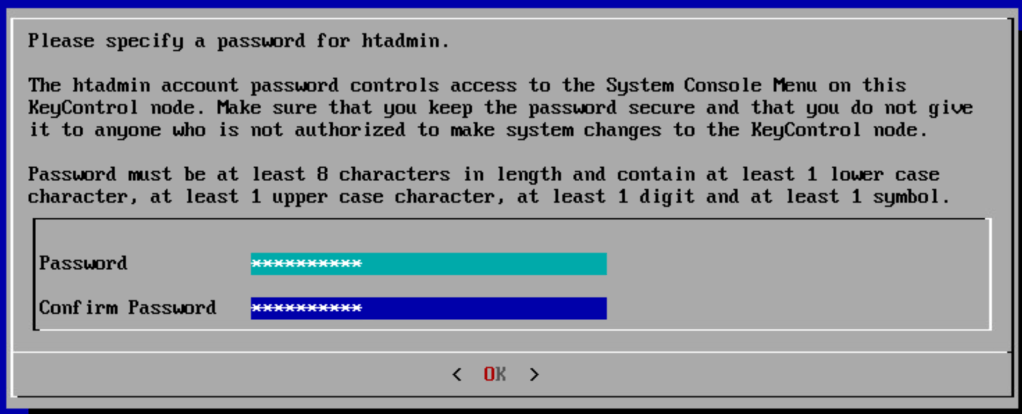
Wait till the system is fully started and press OK. The KeyControl server will display a CentOS login screen.
To initialize the KeyControl webGUI and finish the configuration of the first node go to: https://<kms-ip-address> and login with secroot for both username and password. Accept the EULA and change the password for secroot! Make other basic configuration settings you need/want.
Now that we are logged on we have to Enable the KMIP Service. The Key Management Interoperability Protocol can manage the encryption keys for virtual machines in the cluster that have been encrypted with the vCenter Server for vSphere Virtual Machine Encryption and/or VMware VSAN Encryption. The KMS server is also used to enable the virtual TPM 2.0 hardware for VMs which can be leveraged by hardening VMs by Enabling Windows Virtualization Based Security. (More about that topic in a next blogpost).
Select KMIP in the top banner bar. Go to State and put it on Enabled. Then open Protocol and select Version 1.1 from the drop-down list. As a final go to Restrict TLS and select Enabled to make sure traffic is on the TLS 1.2 protocol. Click the Apply button now to apply the new settings.
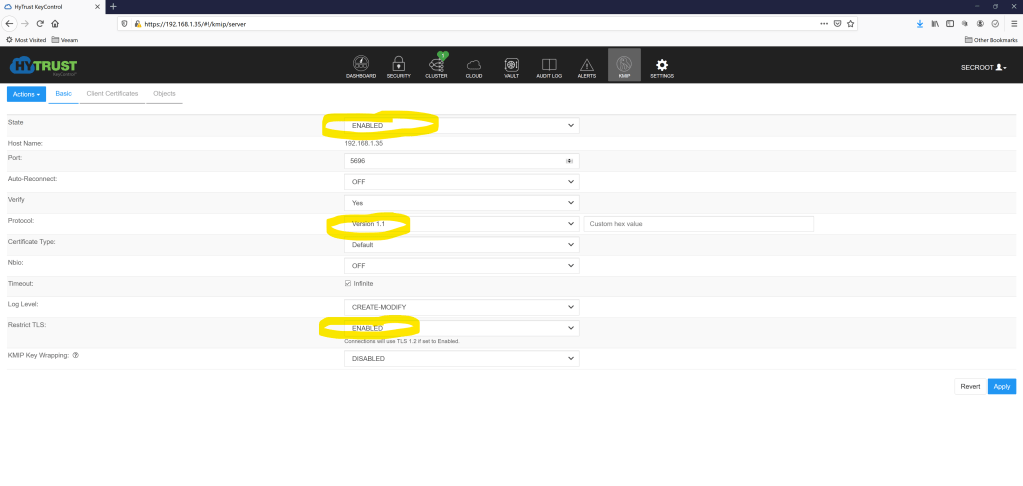
When asked to overwrite all existing KMIP Server settings answer with Proceed. Switch to the Alerts tab to see if the KMIP Server successfully started. Everything started correctly? Great!
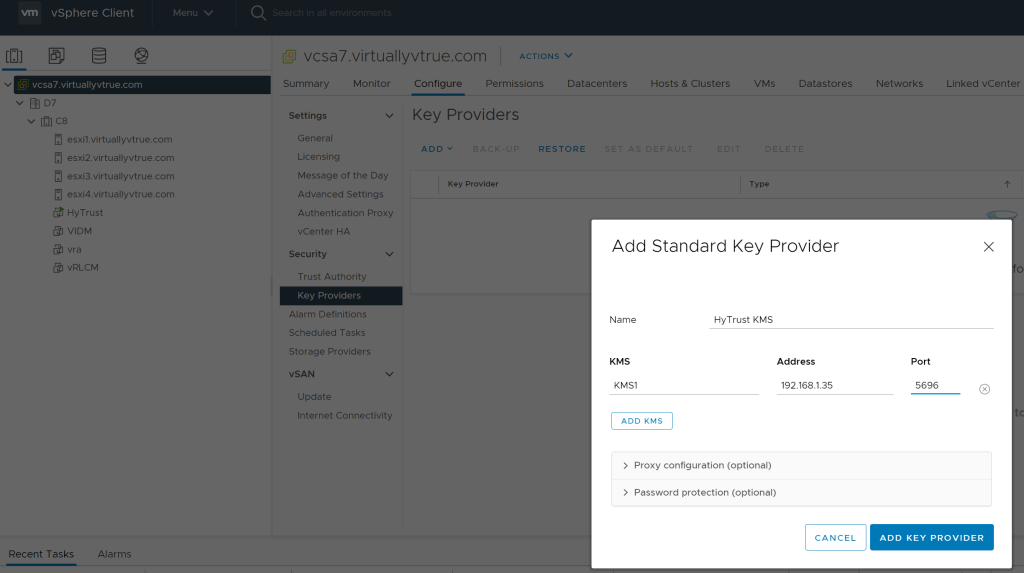
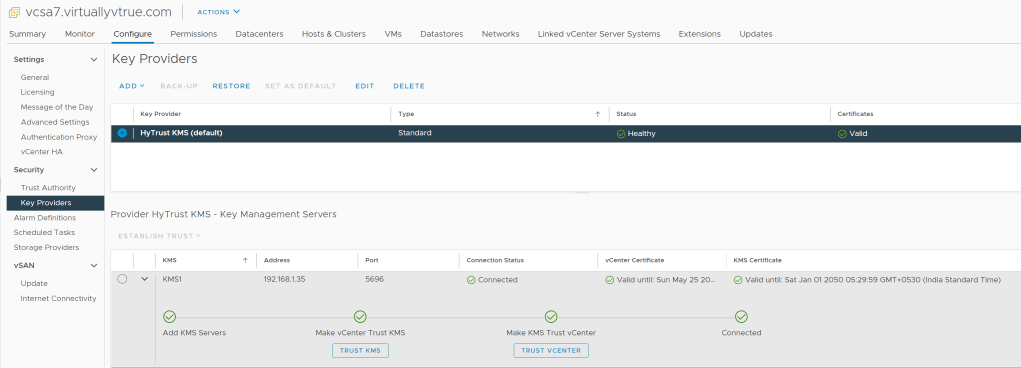
Step 4 – Adding HyTrust KMS Server to vCenter
The certificate details for each node will be displayed.
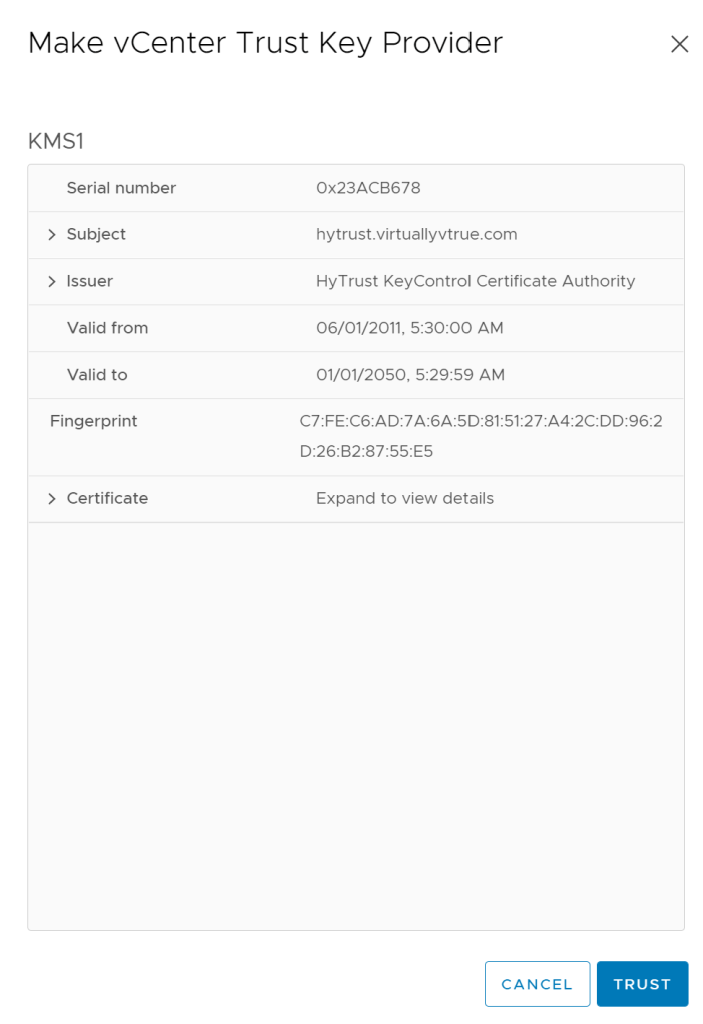
Click the Trust button.
The newly added Key Provider will be displayed.

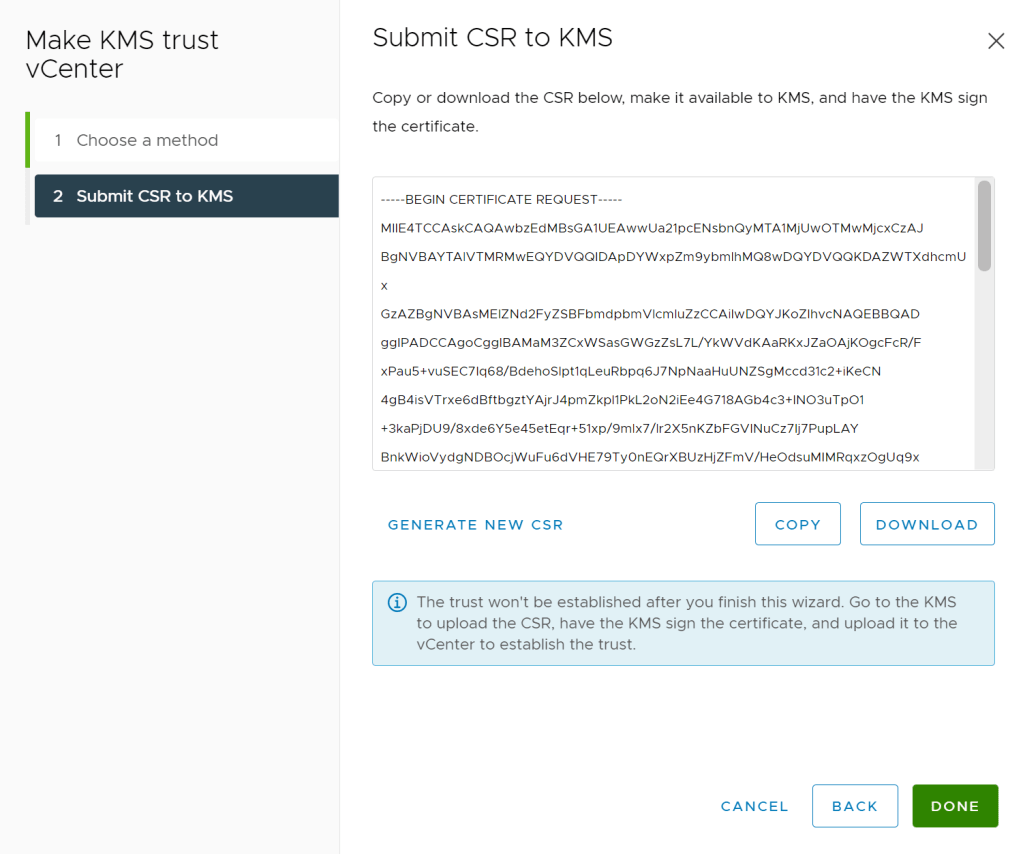
Step 5 – Connecting the HyTrust KMS server with the VMware vCenter server
Select option New Certificate Signing Request (CSR) then press Next.
Now we will switch to the HyTrust KMS server. In the HyTrust KeyControl interface go to KMIP Tab and then select Action. Use the drop down list and select Create Certificate.
On the Certificate Name give it a name that is recognisable to you. I named it VCSA. On the Certificate Expiration select how long the certificate will be valid. Press the Load File button and select the CSR file created by the vCenter server. In my case KMS_signed_csr.pem. Press the Create button to create a new certificate.

Select the new line VCSA and press Actions and Download the certificate. A file called VCSA_<number>.zip will download. Unpack the zip file. There will be 2 files in there. Use the VCSA.pem for the vCenter trust link.

In vCenter click the Upload Signed Certificate link and select the VCSA.pem file from the HyTrust KMS server. And press UPLOAD.

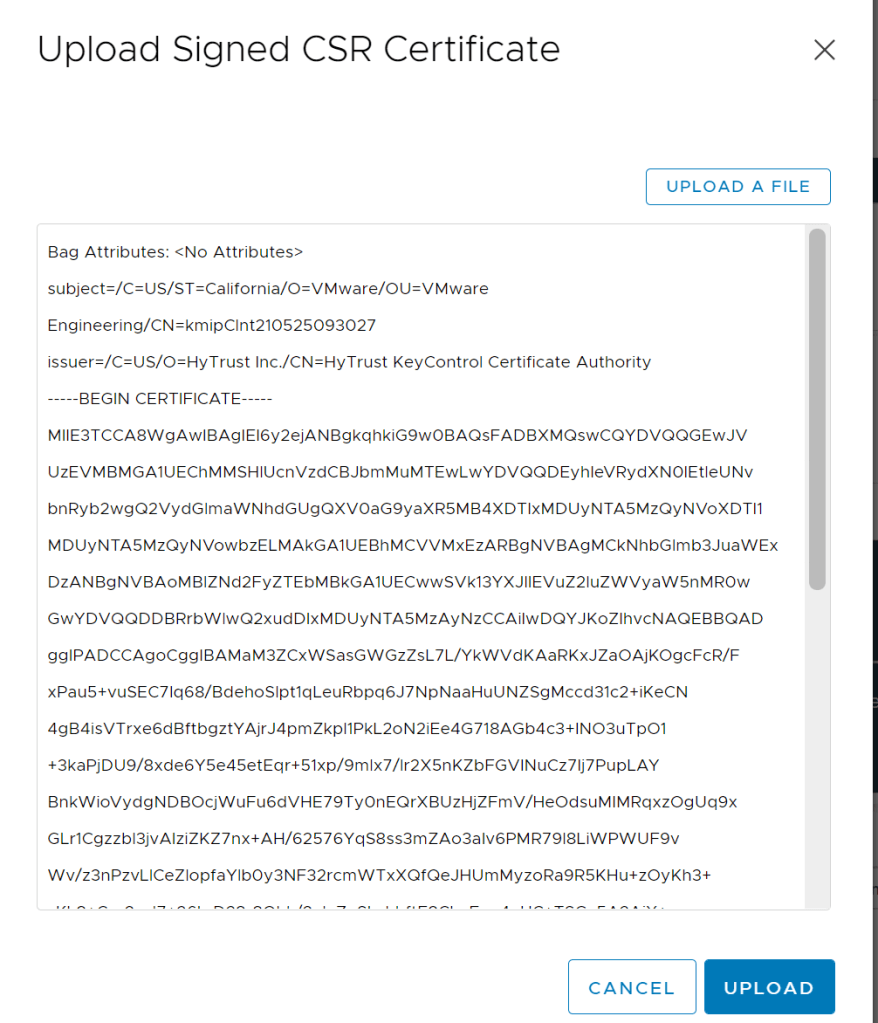
Now the connection is successfully established!
Step 6- How to Configure VM Disk Encryption
After configure the KMS Solution with the Vcenter you can start using the Vsphere Storage Policy to convert the VM’s Disk to be Encryption.
You will need to find a VM that is power off , right click the VM and choose VM Policies –> edit VM Storage Policies
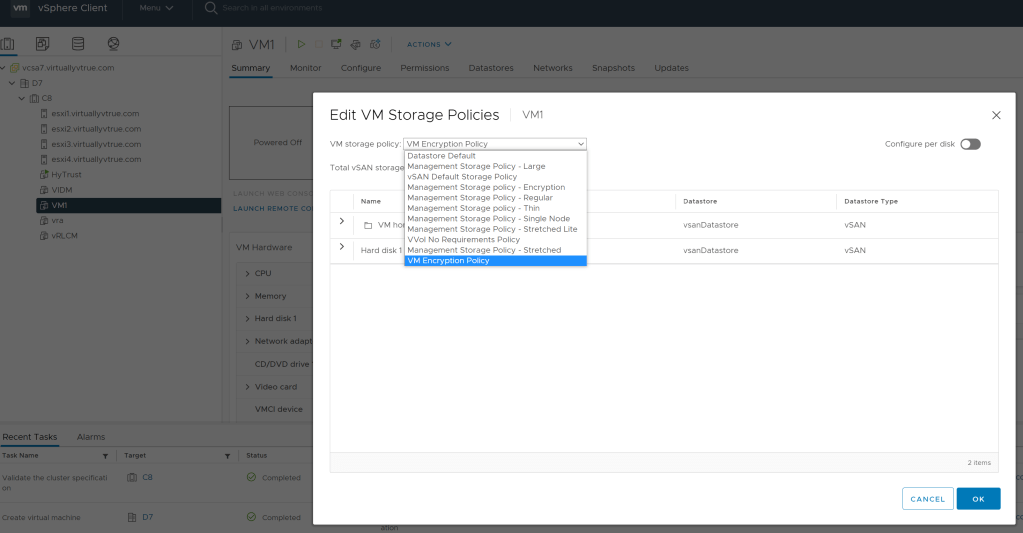
On the VM you can see that your drive in Encryption , and now you will need to consider which more Workload you wish to encrypt.

Happy learning.
