How to configure VCSA 6.7 HA in vSphere Client HTML5, the New High Availability of vCenter Server Appliance.
I would recommend you to go through the vCenter High Availability document.
The vCenter Server Appliance has provided vCenter High Availability (HA) with vSphere 6.5 onwards. In the fully functioning HTML5 release of vCenter 6.7 Update 1 onwards the setup of vCenter HA was hugely simplified. By implementing vCenter HA you can protect your vCenter from host and hardware failures, and significantly reduce time during patching due to the active / standby nature of the vCenter cluster.
The vCenter HA architecture is made up of the components in the vSphere image below. The vCenter Server Appliance is cloned out to create passive and witness nodes. Updated data is replicated between the active and passive nodes. In the event of an outage to the active vCenter the passive vCenter automatically assumes the active role and identity. Management connections still route to the same IP address and FQDN, however they have now failed over to the replica node. When the outage is resolved and the vCenter that failed comes back online; it then takes on the role of the passive node and receives replication data from the active vCenter Server.
The vCenter HA feature is part of the vSphere Standard license
vCenter HA will be used to protect vCenter Server Appliance against host, hardware and application-level failures.

Requirements:
- vCenter HA was introduced with the vCenter Server Appliance 6.5
- The vCenter deployment size should be at least small, and therefore 4 vCPU 16 GB RAM.
- A minimum of three hosts.
- The hosts should be running at least ESXi 5.5.
- The management network should be configured with a static IP address and reachable FQDN.
- SSH should be enabled on the VCSA.
- A port group for the HA network is required on each ESXi host.
- The HA network must be on a different subnet to the management network.
- Network latency between the nodes must be less than 10ms.
- vCenter HA is compatible with both embedded deployment model and external PSC.
While configuring VCHA, it triggers few scripts and checks.
Scripts location: – /usr/lib/vmware-vcha/scripts
The script performs the following steps:
- It takes PNID from /etc/vmware/systemname_info.json
- Verifies if the retrieved PNID is IP Address or not
- If its IP, IP Variable is assigned as the PNID from Step 1
- If PNID from Step 1 is not an IP Address, read the IP from file /etc/systemd/network/10-eth0.network
- Match IP and PNID by executing “/usr/bin/host -W 30 -T <IPAddress>”, compare the result with PNID
- If Matches, then IP is assigned as the address from Step 4
- If IP OR PNID is EMPTY raise exception “Unable to get hostname resolved IP address for eth0”
Configuring vCenter HA:
Log into the vSphere client and select the top level vCenter Server in the inventory. Click the Configure tab and vCenter HA. The vCenter HA summary page is displayed with a list of prerequisites, ensure these are met along with the requirements above. Click Setup vCenter HA.

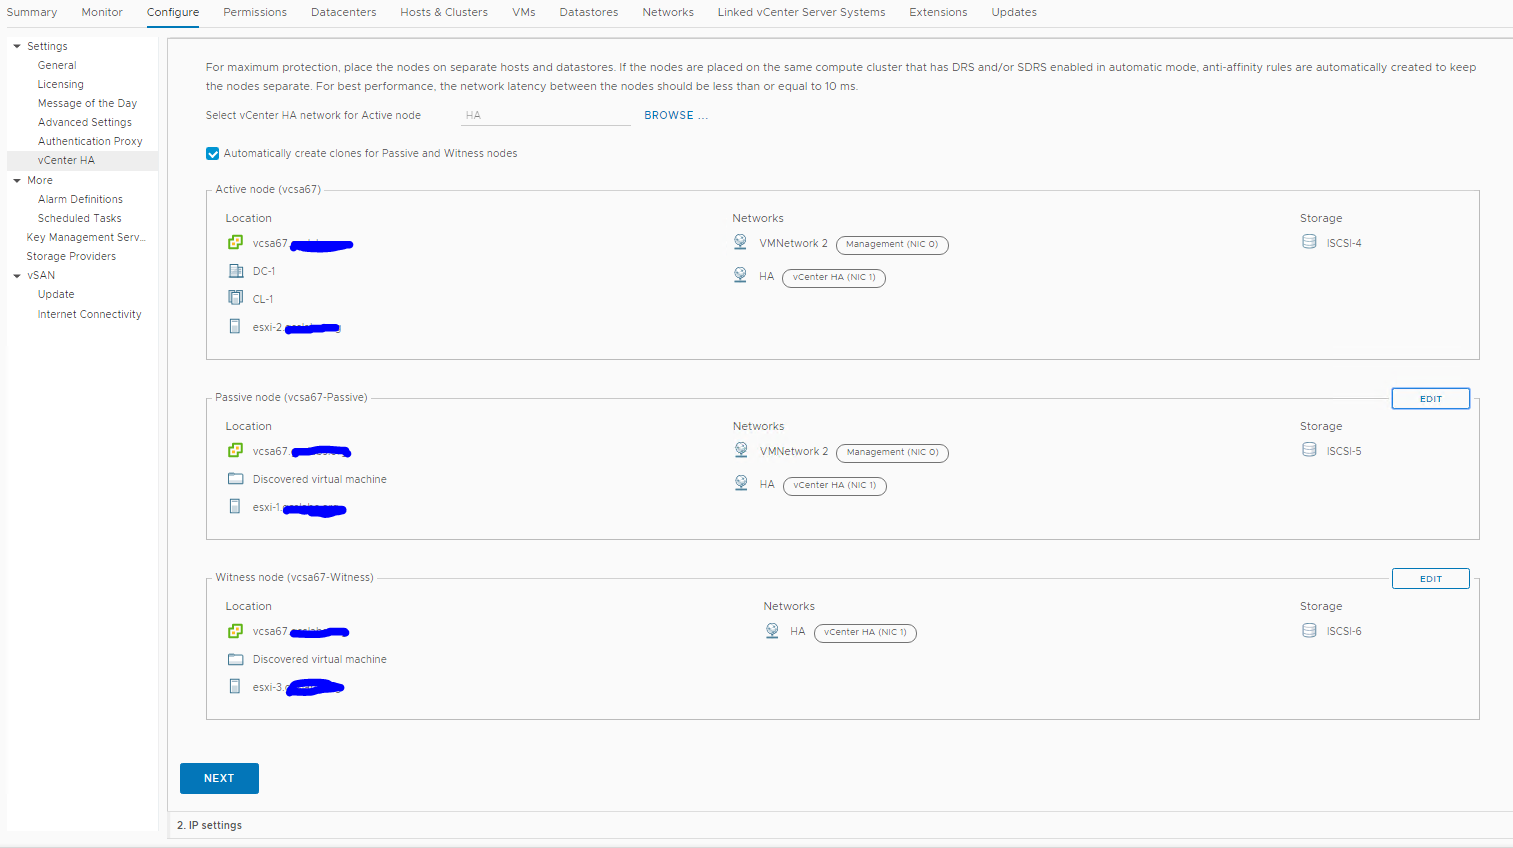
Select the vCenter HA network by clicking Browse. Scroll down the vCenter HA resource settings, review the network and resource settings of the active node of the vCenter Server. Scroll down to the passive node and click Edit. Follow the on-screen prompts to select a folder location, compute and storage resources. Select the management and HA networks for the passive node, review the settings once complete and click Finish. Follow the same steps for the witness node.
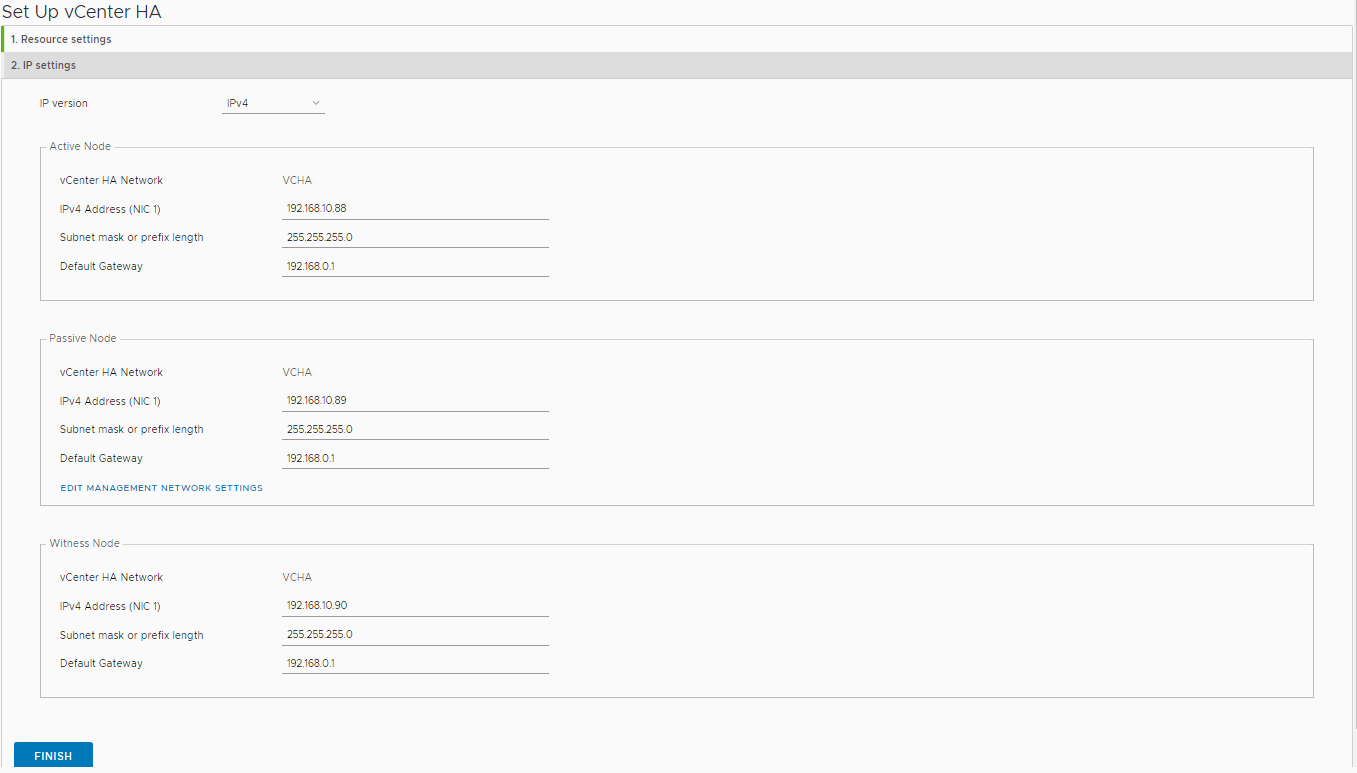
On the IP settings page enter the HA network settings for the active, passive, and witness nodes. Click Finish.
The vCenter Server will now be cloned and the HA network settings applied, this can be monitored from the tasks pane. Once complete the vCenter HA state will show Healthy, and all nodes in the cluster will show Up.

With this the VCHA configuration is completed is completed.
